Configuration
Configurations
User can update and manage the configuration level changes from this page.
Go to Configuration
Click on Configuration option from Settings menu as shown in the image below.
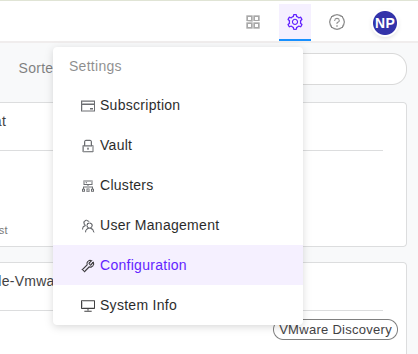
-
Once you land on
Configurationspage, you can view six tabs as:- User Preferences
- Ignore Processes
- App Host
- SMTP Settings
- SAML Providers - in case CHAI™ is hosted in an appliance
- Discover Utility
-
Only user with admin privilege can view and access App Host, SMTP Settings and SAML Providers.
- Only user with admin privilege can share the key in appliance.
- Any user can view and access user Preferences, Ignore Processes.
- User can view the previously set values in the respective fields in editable format. user can edit them and save.
- If the fields are blank then values are yet to be set.
- Supply the appropriate inputs for your desired settings option and save it for future use.
User Preferences
- In
User Preferencesyou will have two action items as, - Set bulk action limit to Start or Stop X-Ray per Host.
- Logout session time
To set up Bulk Selection limit:
- User need to set bulk selection limit for Start and Stop X-Ray per Host. Default bulk selection limit for X-Ray per Host is 5.
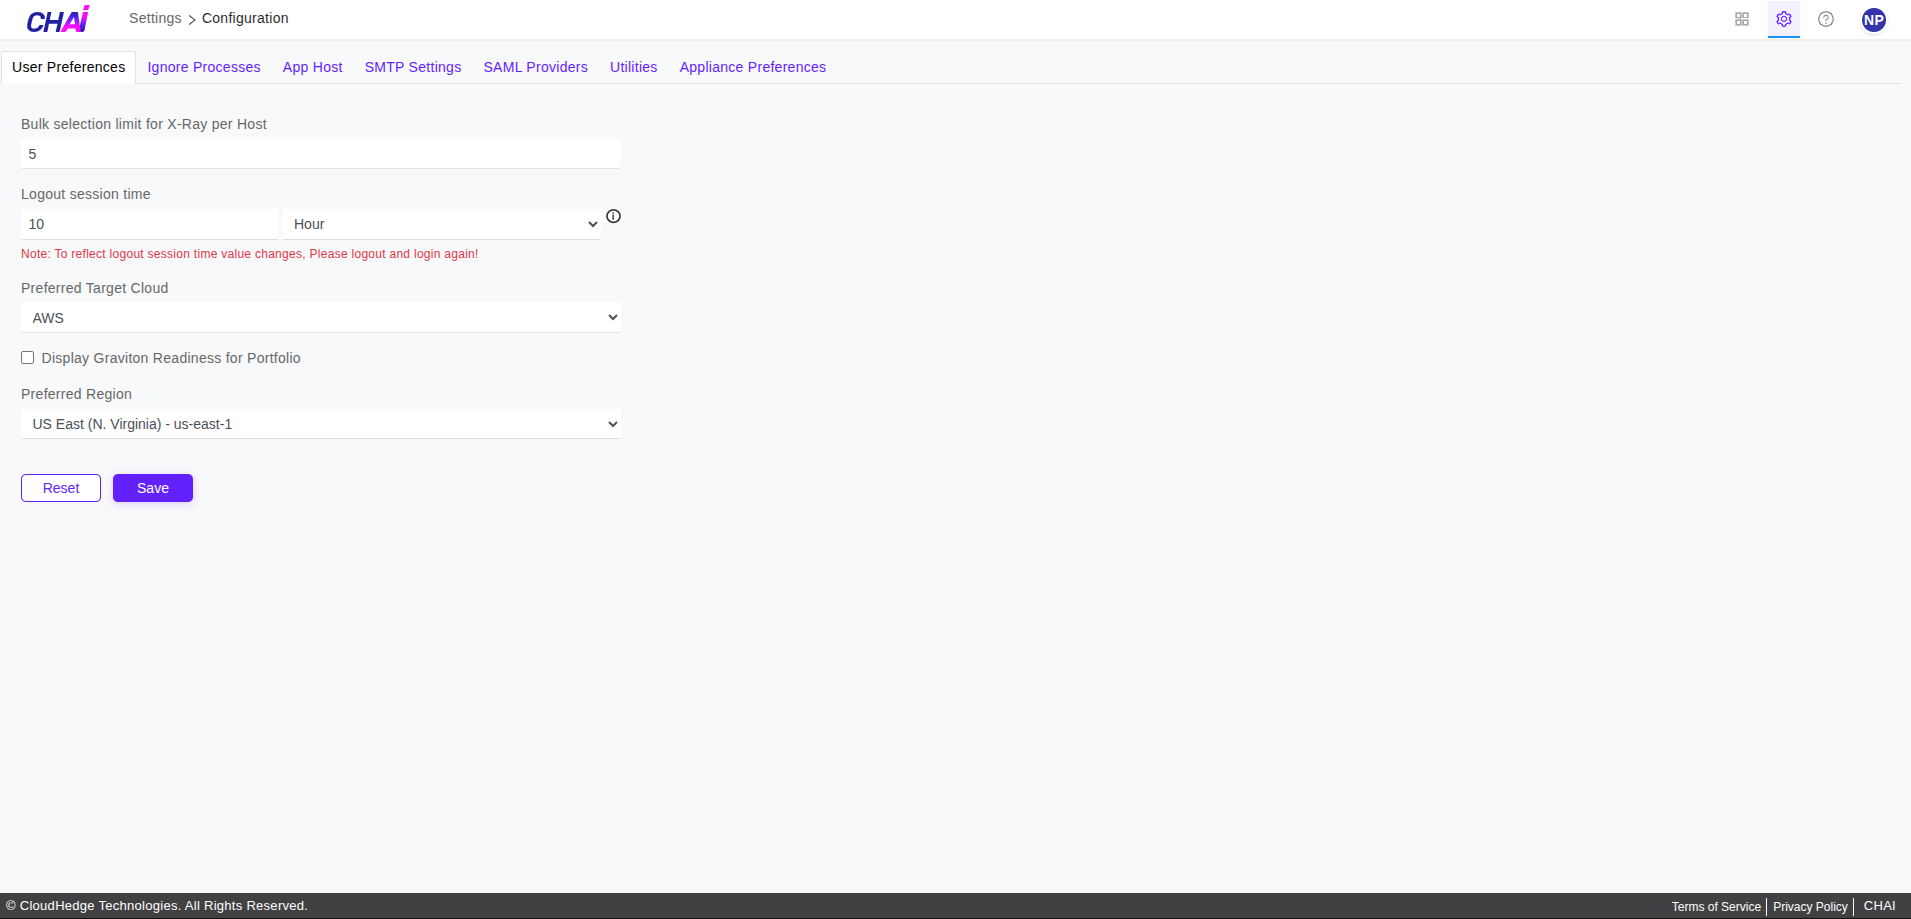
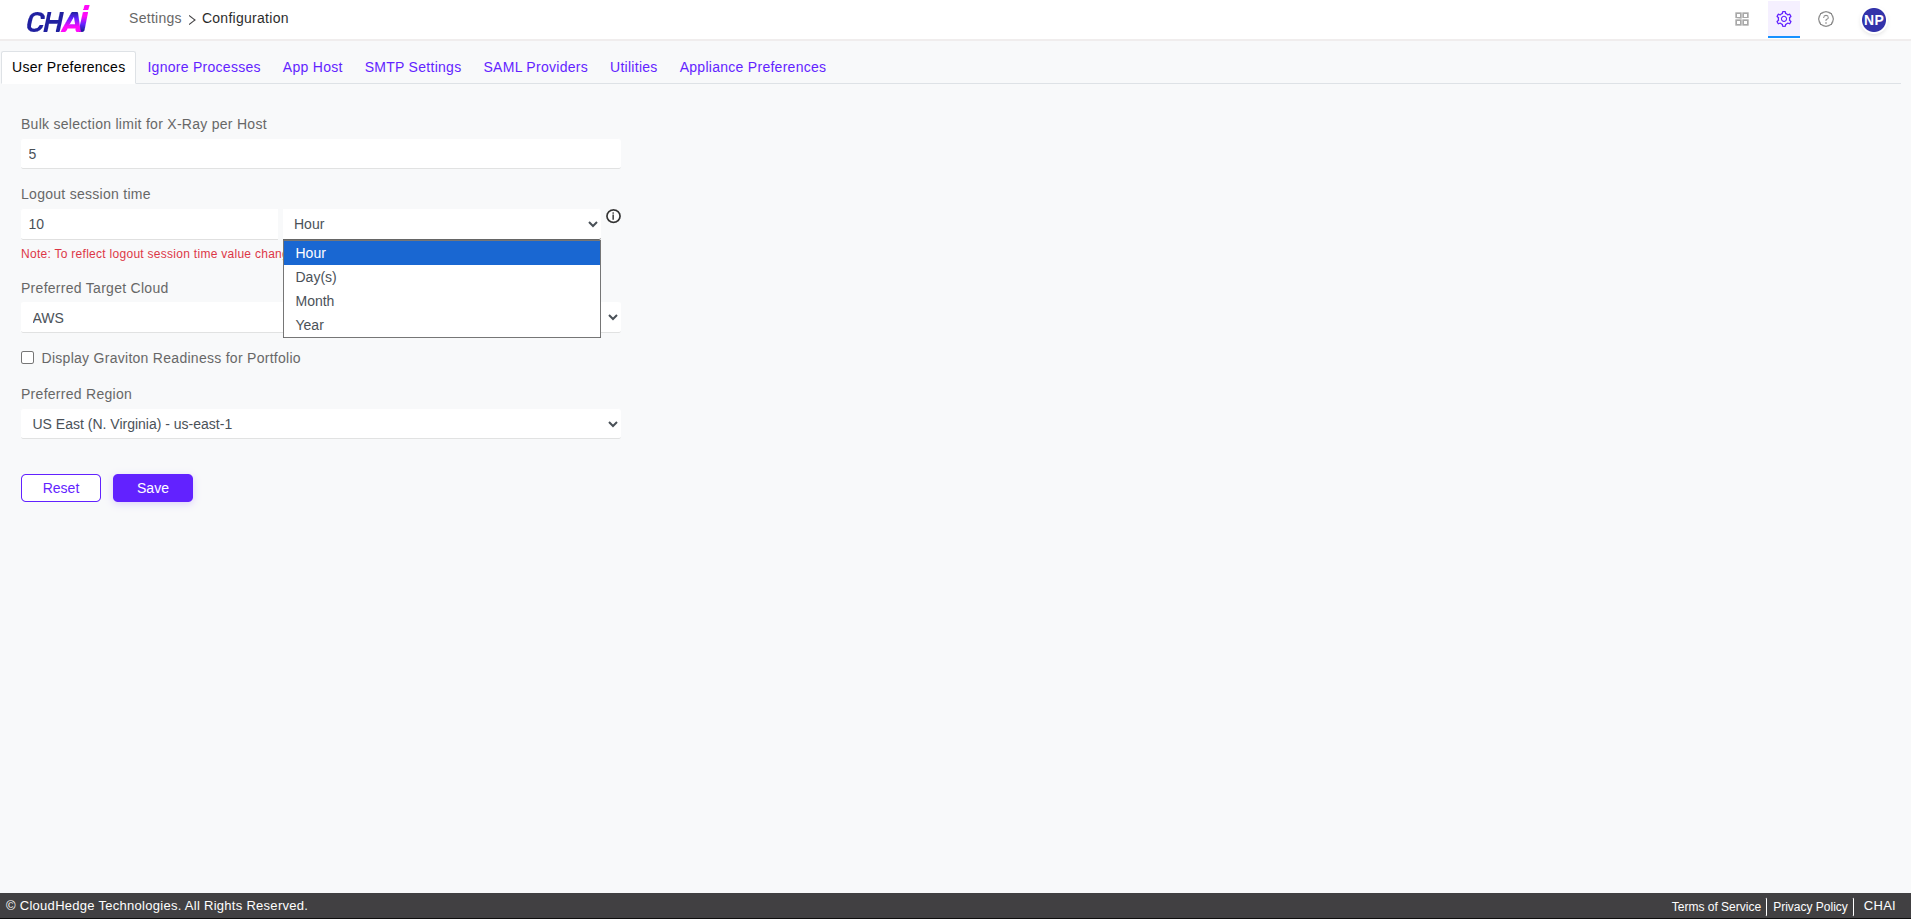
To set up session time:
- User can configure session time as per your requirement. (Example: you can set up session time in hour/day/month/year) so that session will be maintained as per the given time. Default session time is 1 hour.
- To reflect the session time changes, you need to logout once and then login.
- Just add required number in the input field and select unit like hour/day/month/year from dropdown.
Please refer image below, to view how to set session time.
- Save the changes once you are done with updation at user preferences page.
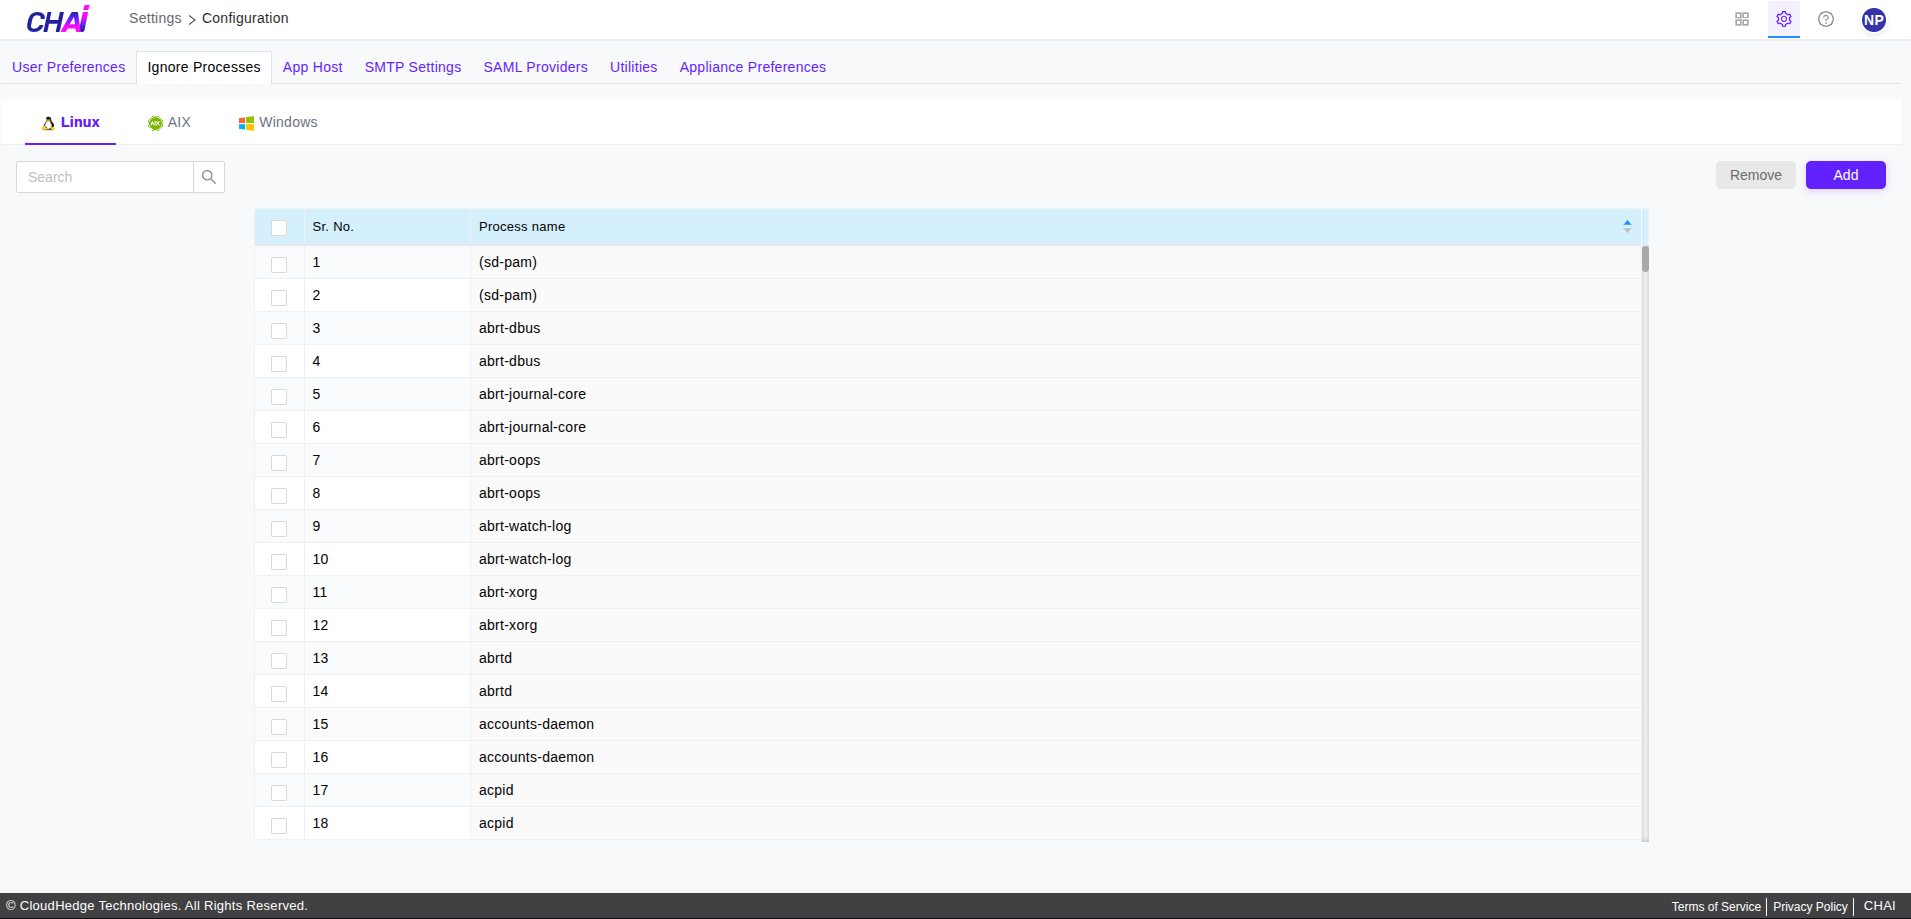
Ignore Processes
-
Ignore Processescontains user ignore process list for Linux, Windows. -
User can perform following actions on both Linux, Windows ignore list:
-
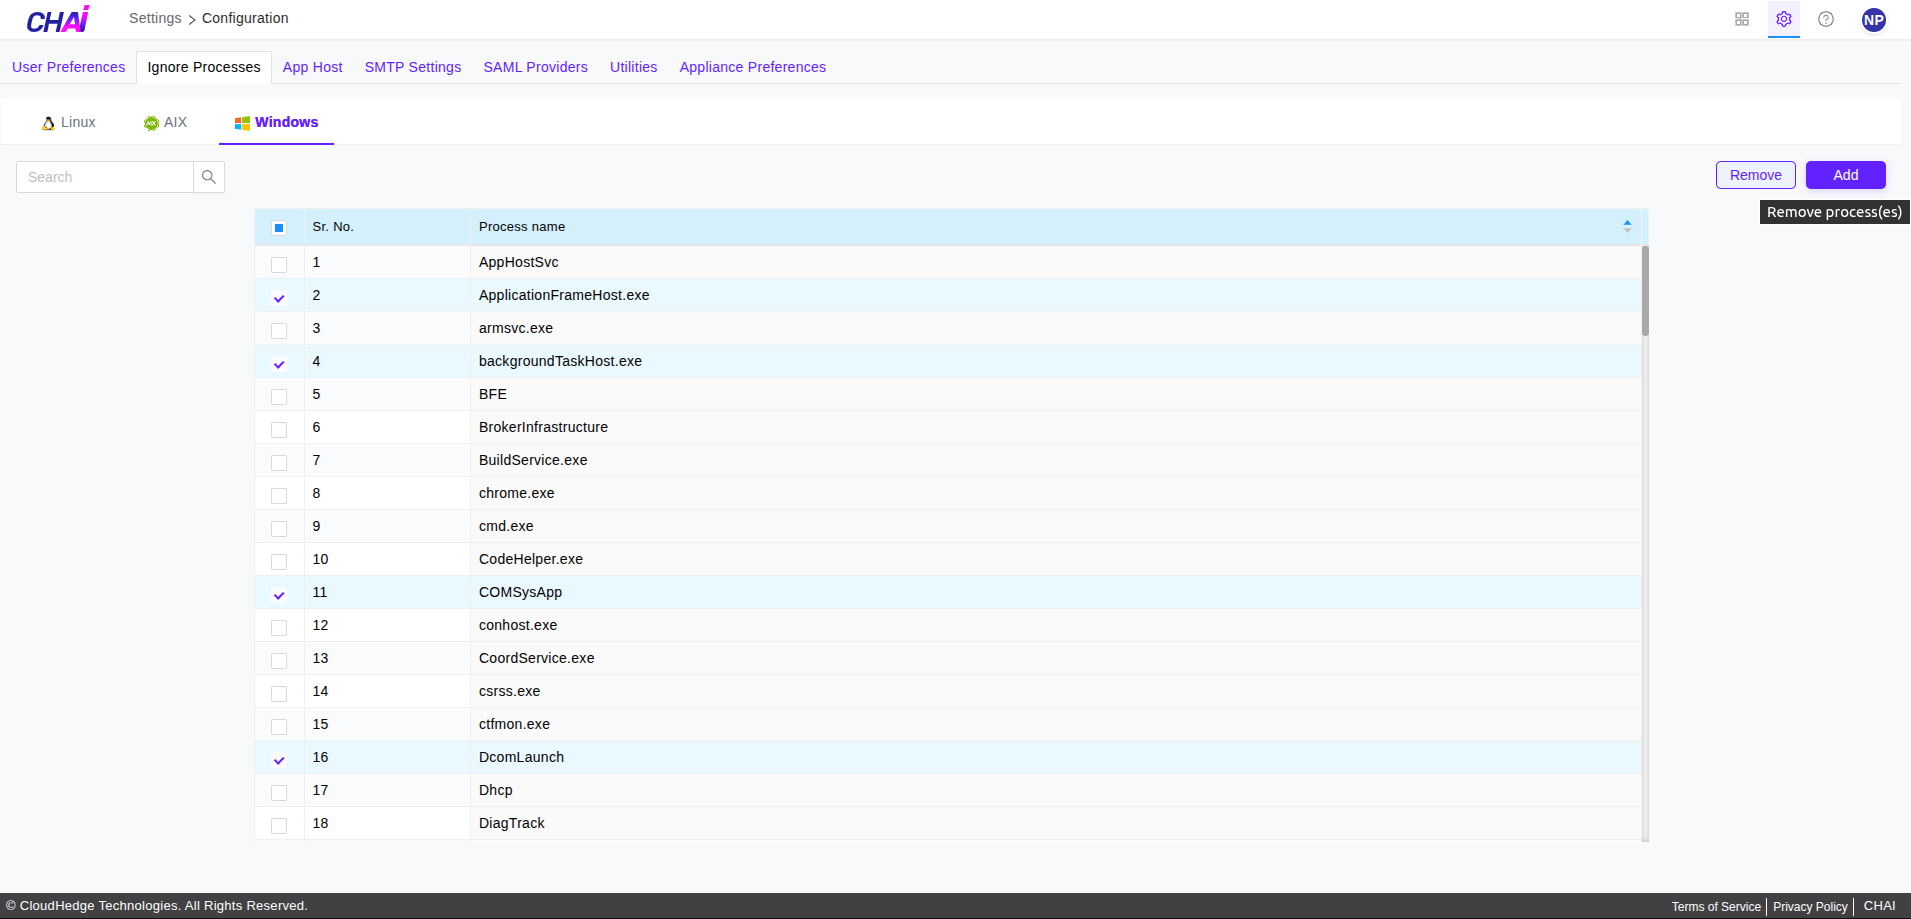
View existing ignore process list
- Add and remove one or more process(es)
- Search process from the list
-
Sort the list
-
When you click on the
Ignore Processestab you are able to view user ignore list as shown in the image below.
-
Click on Add button to add one or more process(es) in user ignore list as shown in the image above.
-
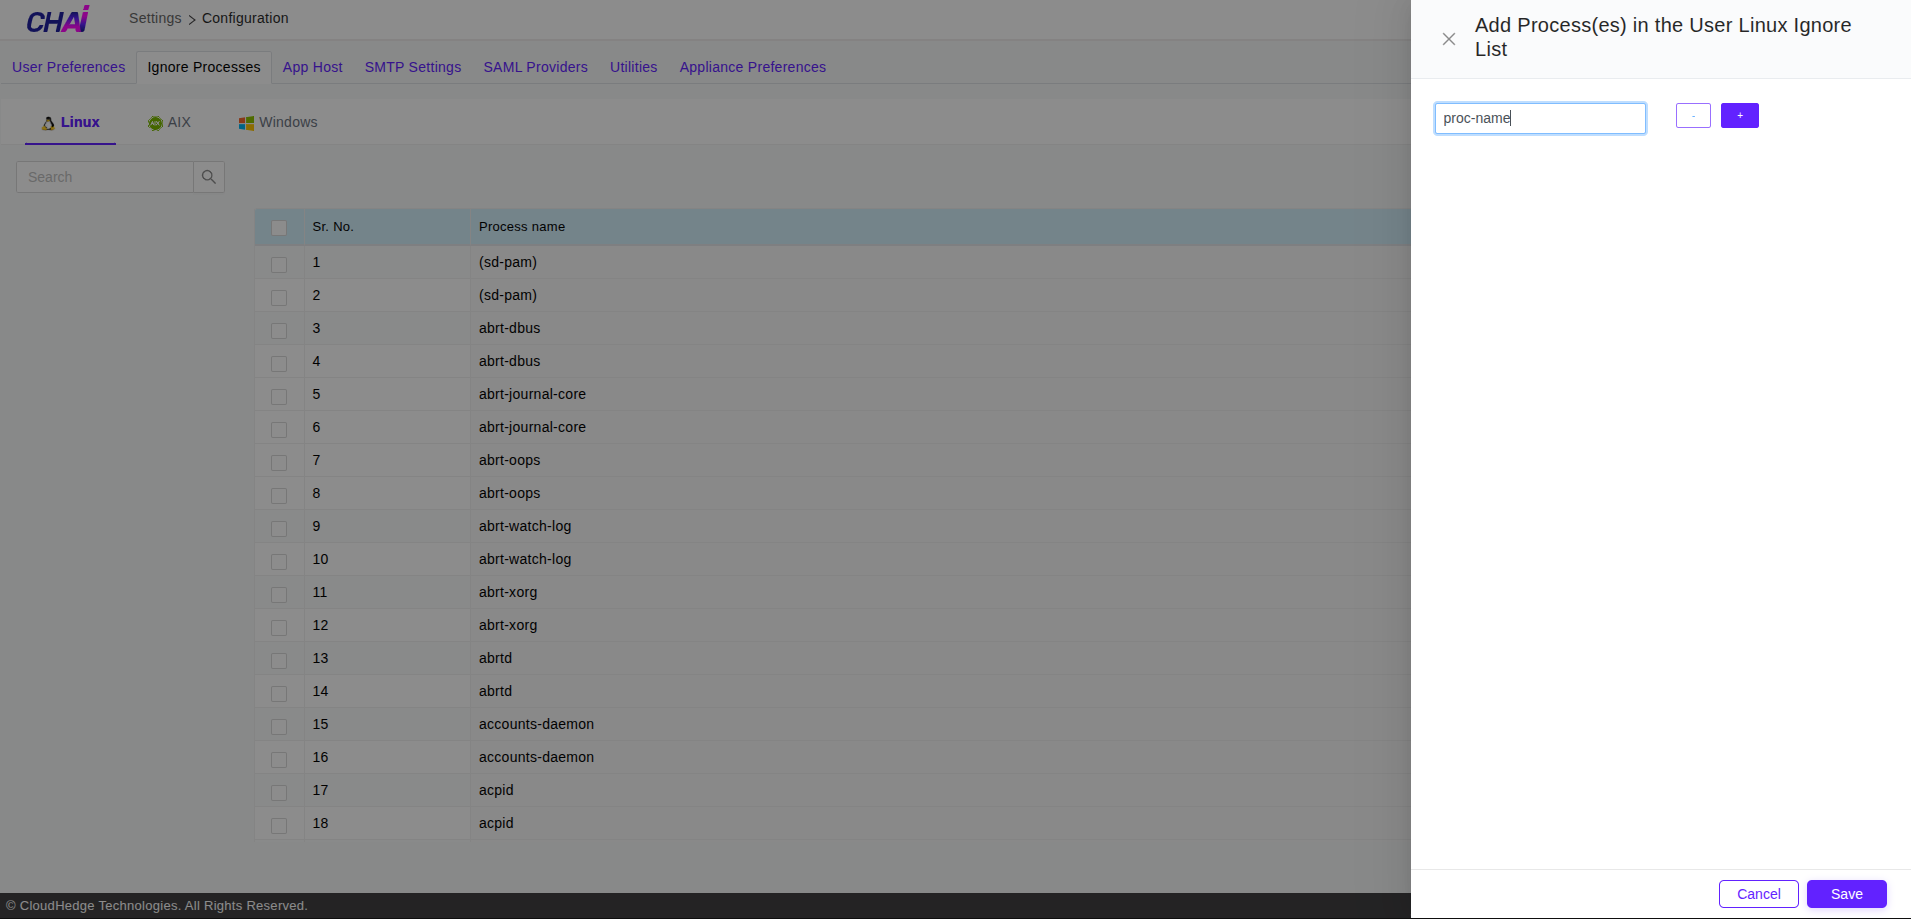
Once you click the Add button, the drawer will open as shown in the image below.
-
Please make sure to enter valid process name which contains:
-
Maximum of 100 characters
-
Alphanumeric characters (0-9, a-z, A-Z) and (-_)
-
To remove one or more process(es) from user ignore list, select respective checkbox(es) and then click on Remove button as shown in the image below.
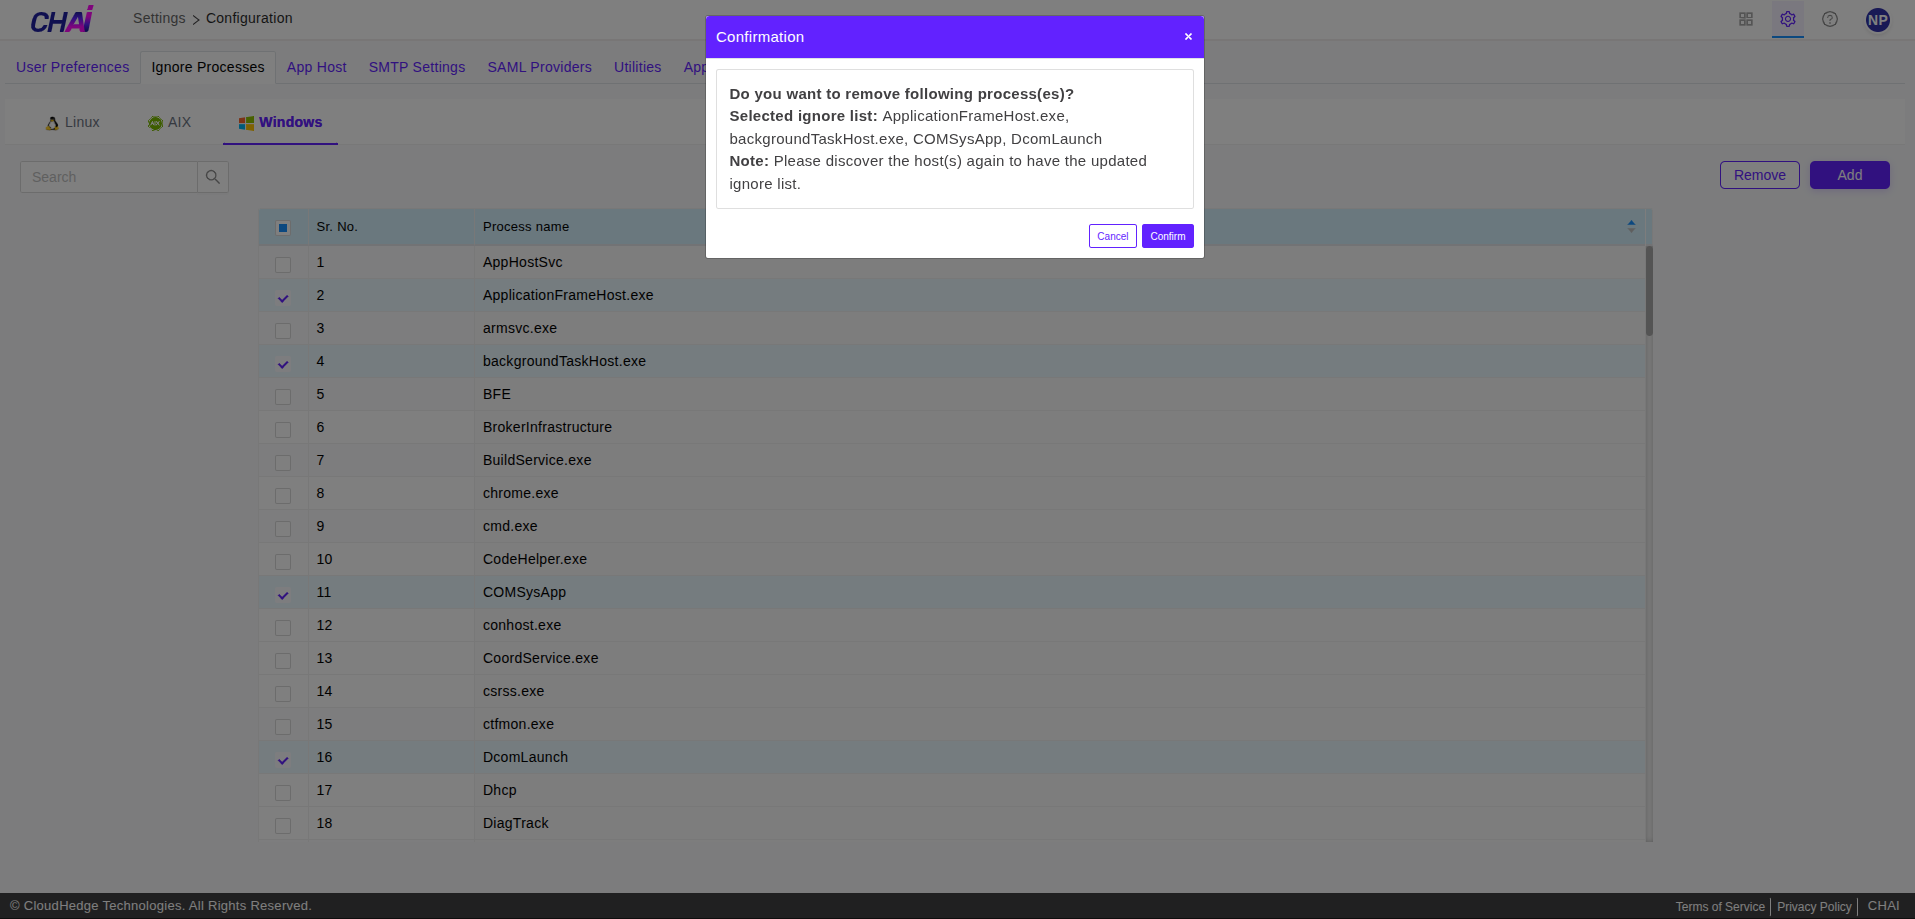
Note: Before updating(adding/removing the process(es) in/from list respectively) user ignore list, you will get the confirmation popup with note as shown in the image below.
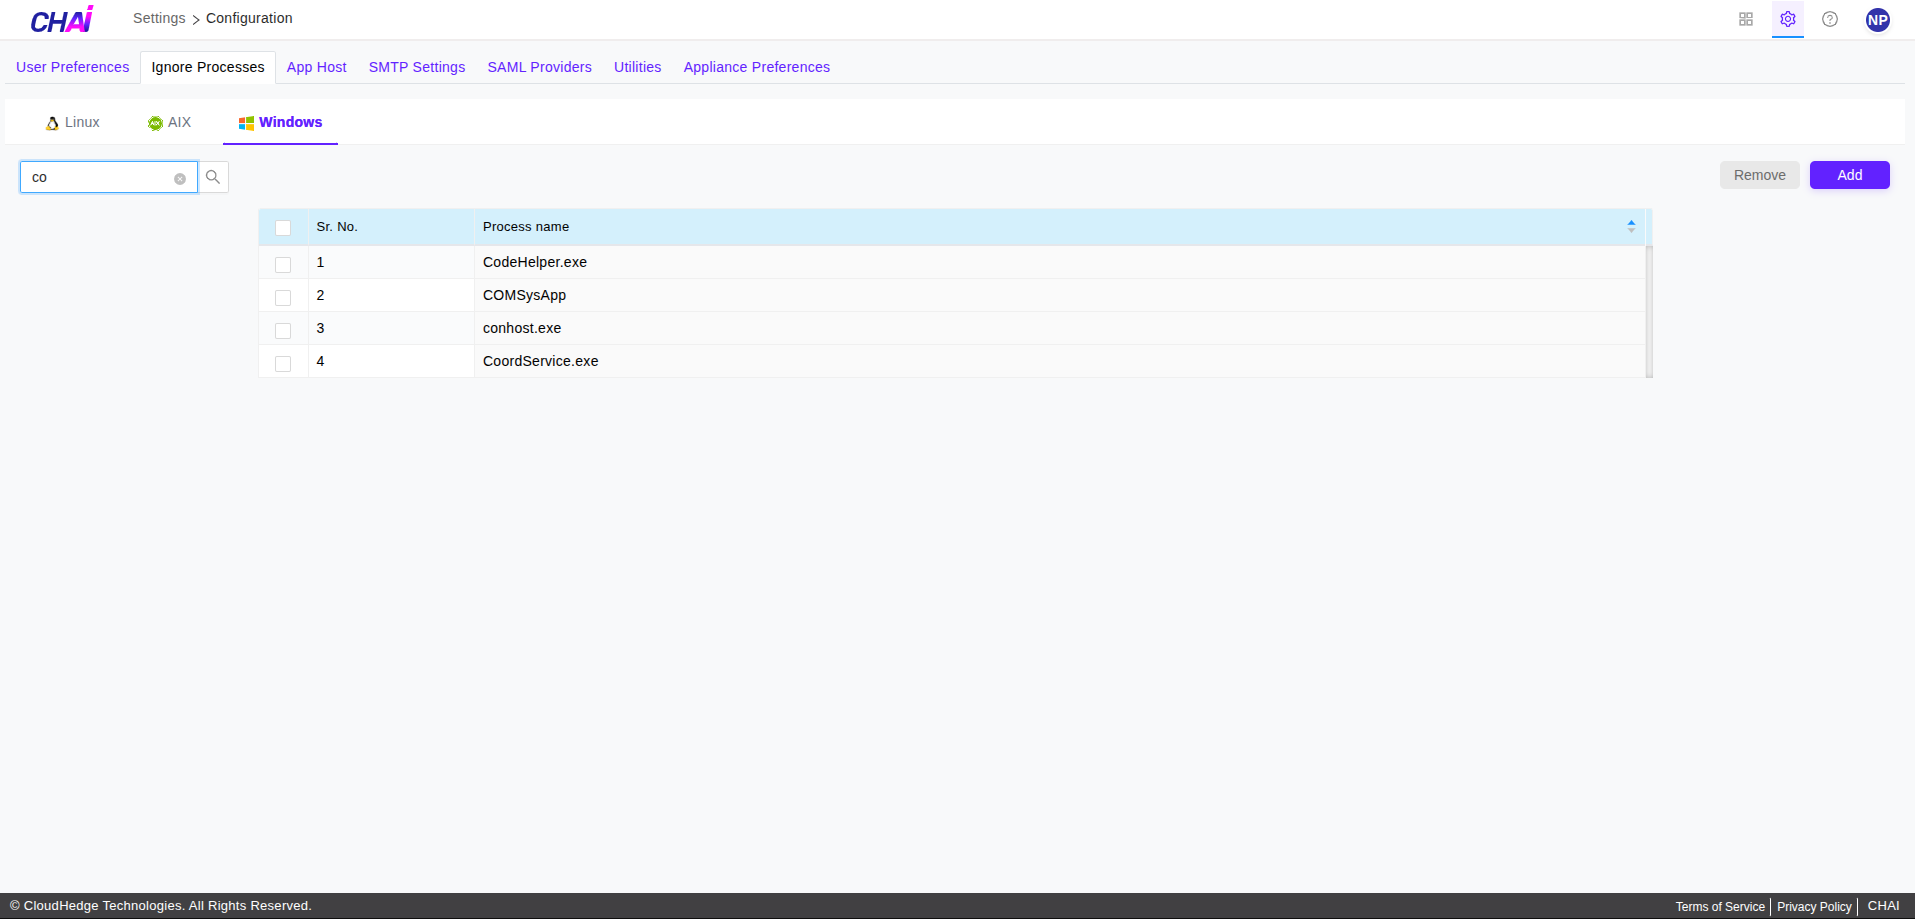
- User can search the process from user ignore list as shown in the image below.
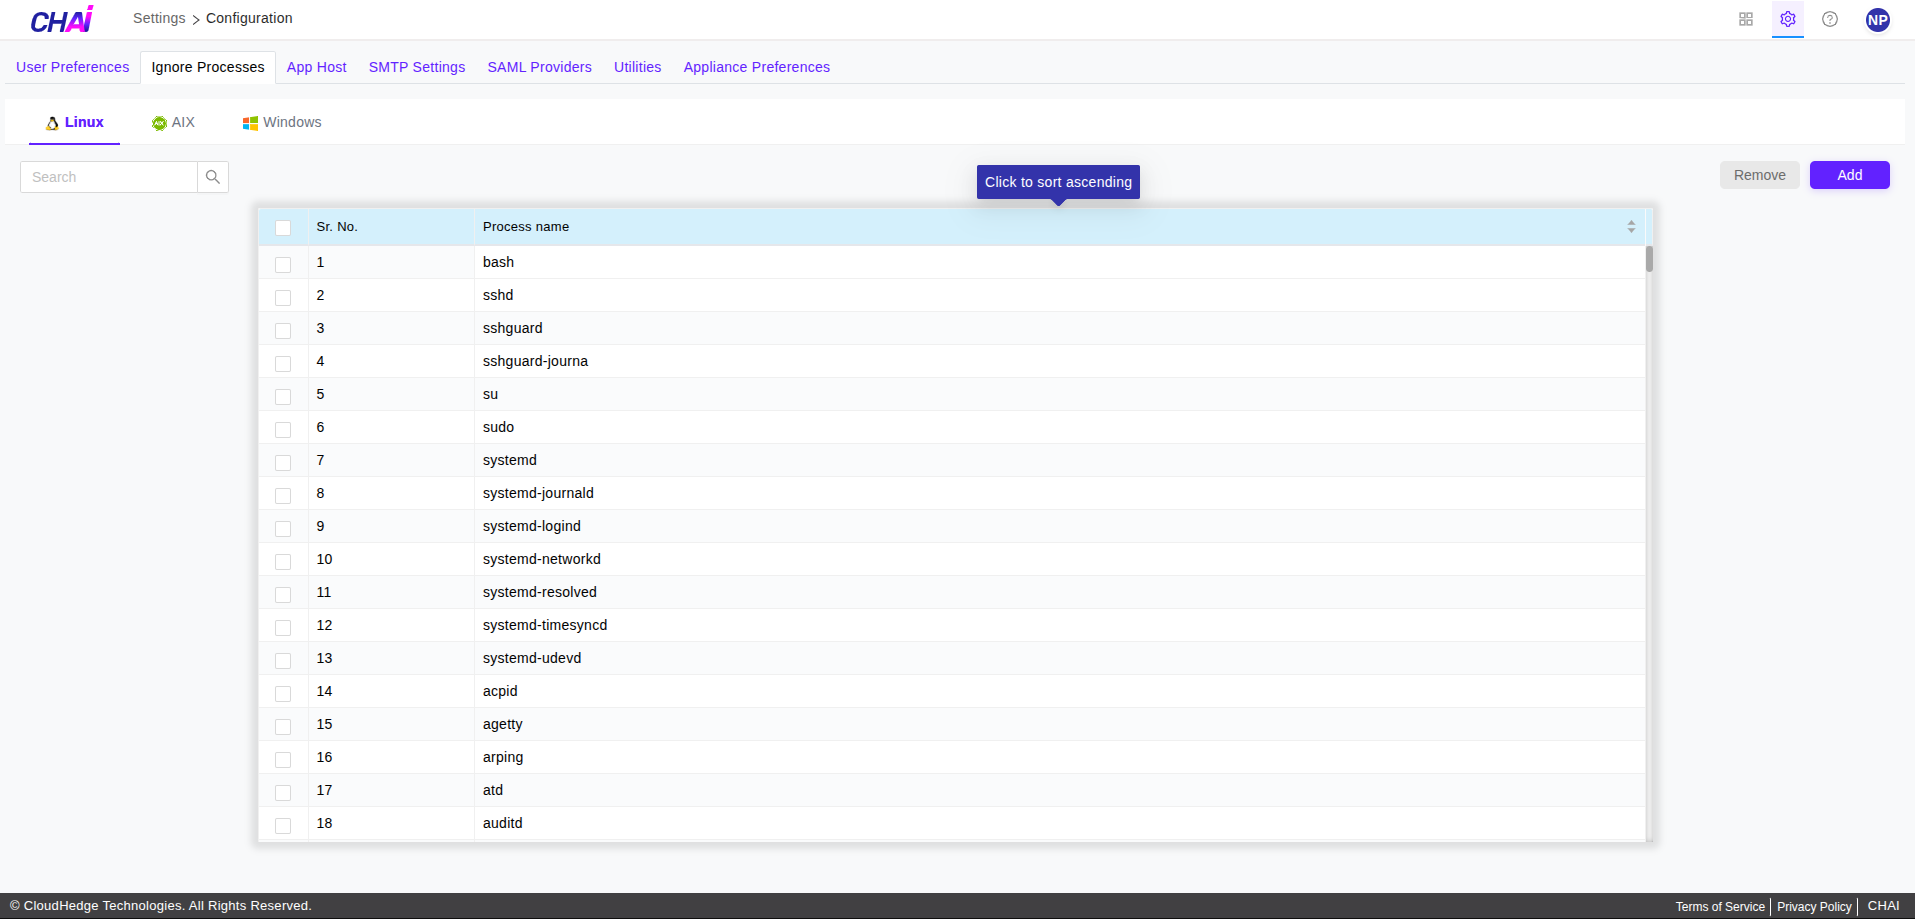
- User can sort user ignore list by ascending/descending order with the help of arrow button provided in the header at
Process namecolumn, please refer below image.
App Host URL
- App Host URL is the URL used by chtool and winchtool to communicate back with server.
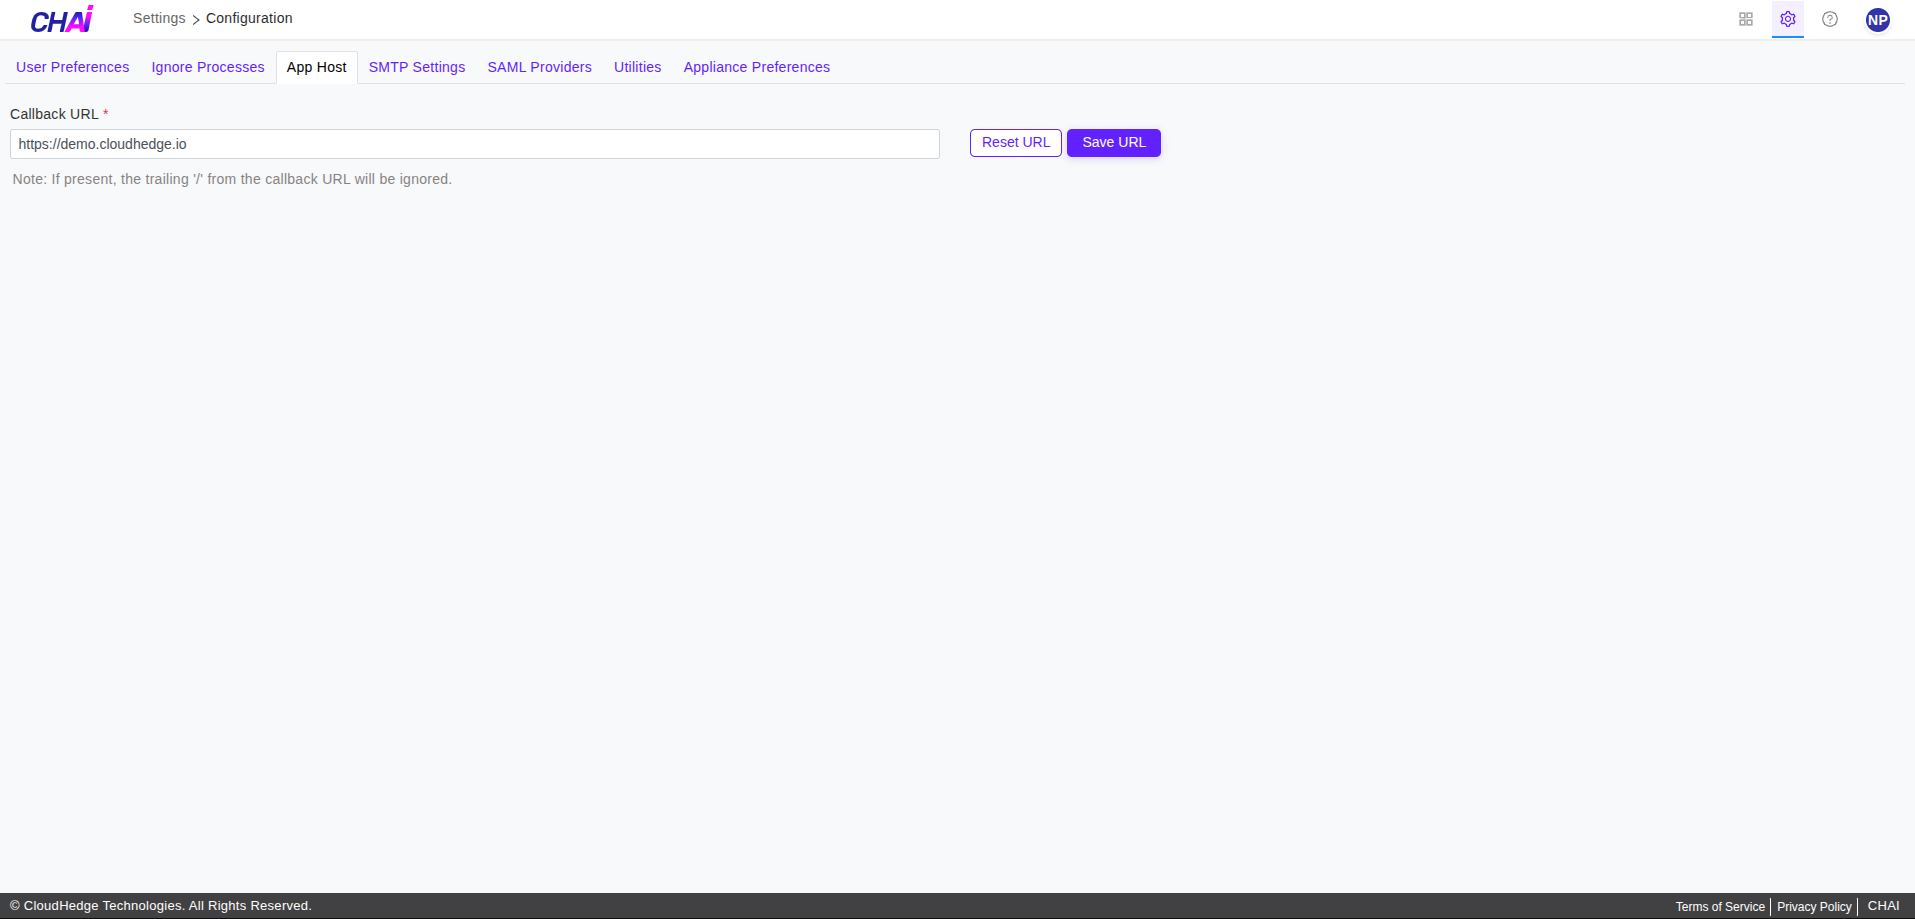
In the above image, user can view the App host URL in editable format.
SMTP Settings
- SMTP settings contains the details required for mailing functionality. like your authenticated user, smtp server details etc.
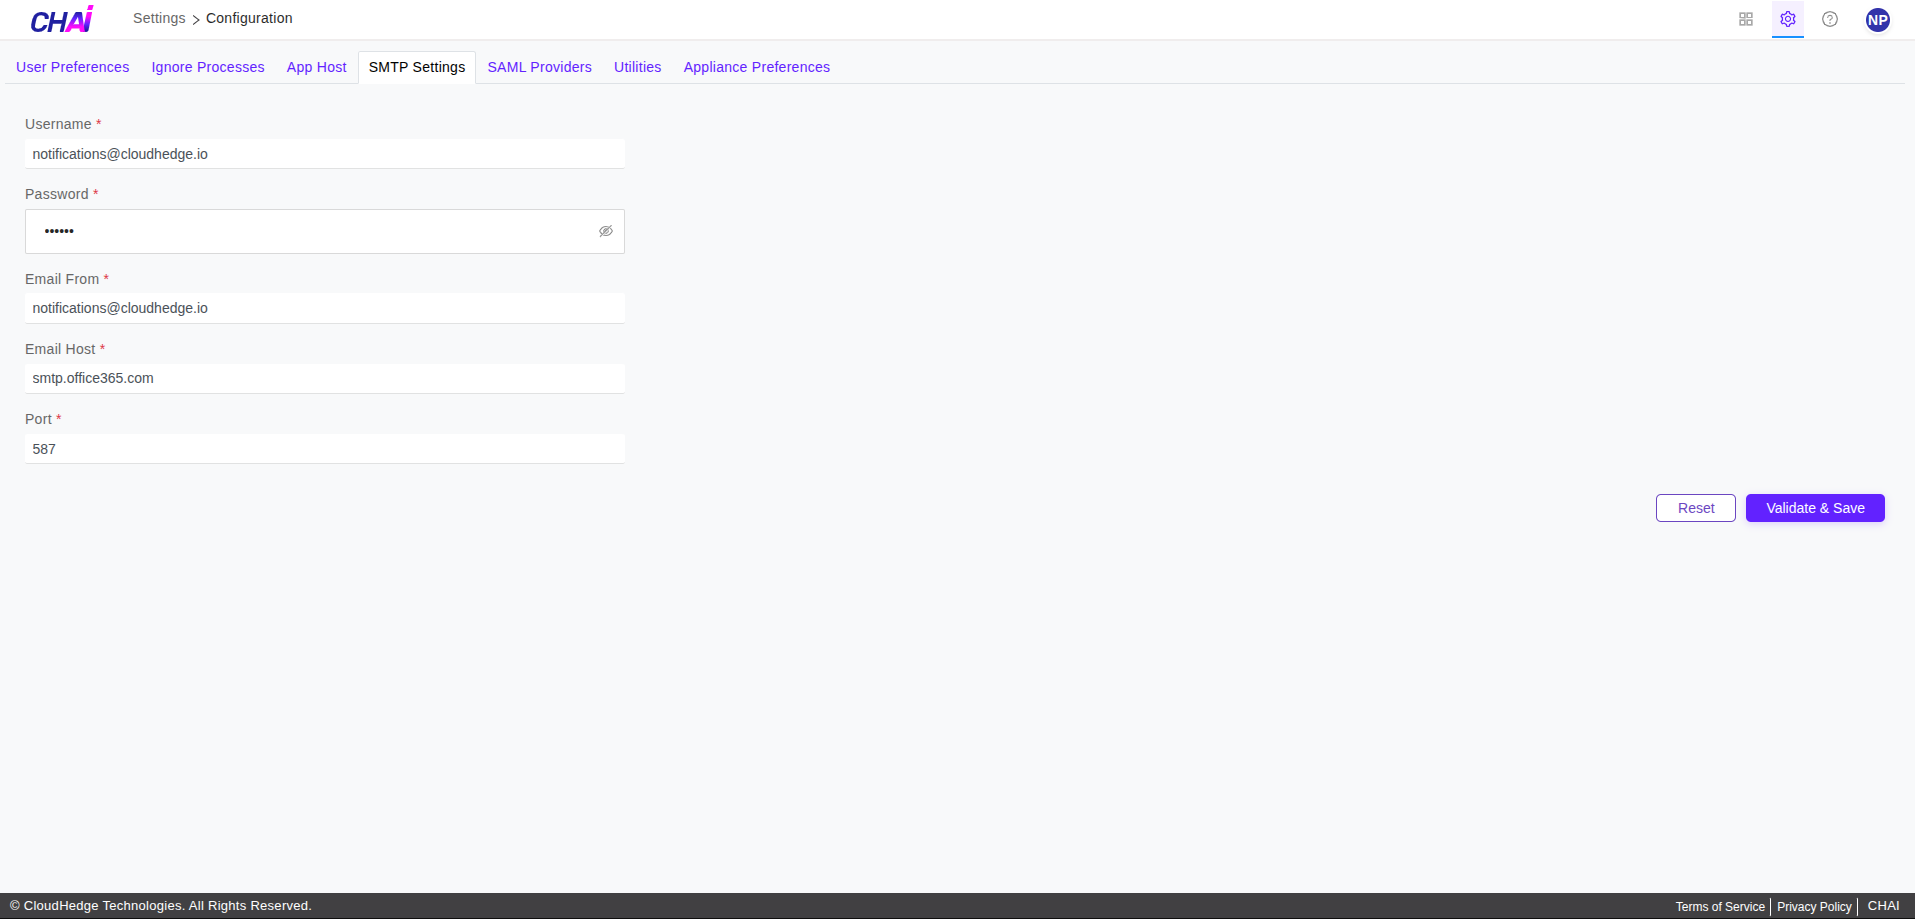
In the above image, user can view the page for SMTP settings.
Note: Make sure to provide the right inputs in the fields and verify them.
SAML Providers
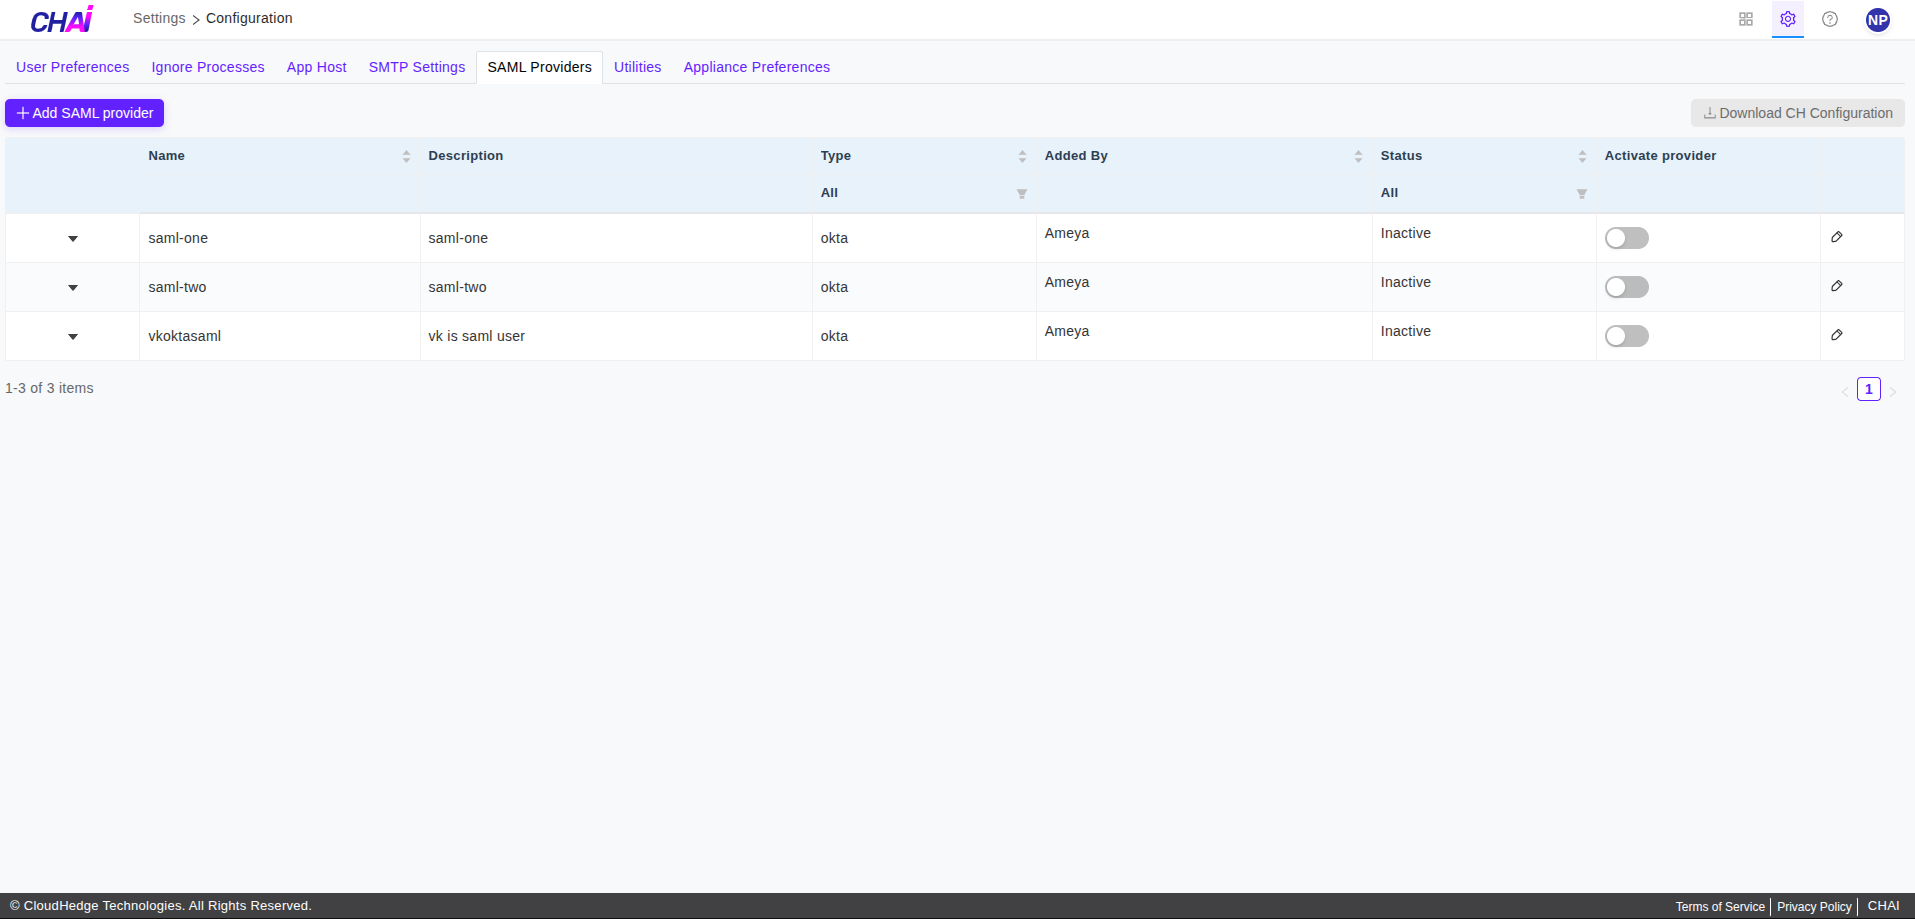
-
SAML Providersis the single sign on SAML strategy. This setting is present only in an appliance installation. -
User can securely login to application by logging to identity providers.
- User can configure Okta and Microsoft Entra ID (identity providers).
- User can edit and delete the configuration.
- Only one configuration active at time.
- When you click on
SAML Providerstab you are able to view the +Add SAML provider button.
Note: Assuming you have the okta/Azure account with SAML setup. Please refer links
Add a SAML Provider
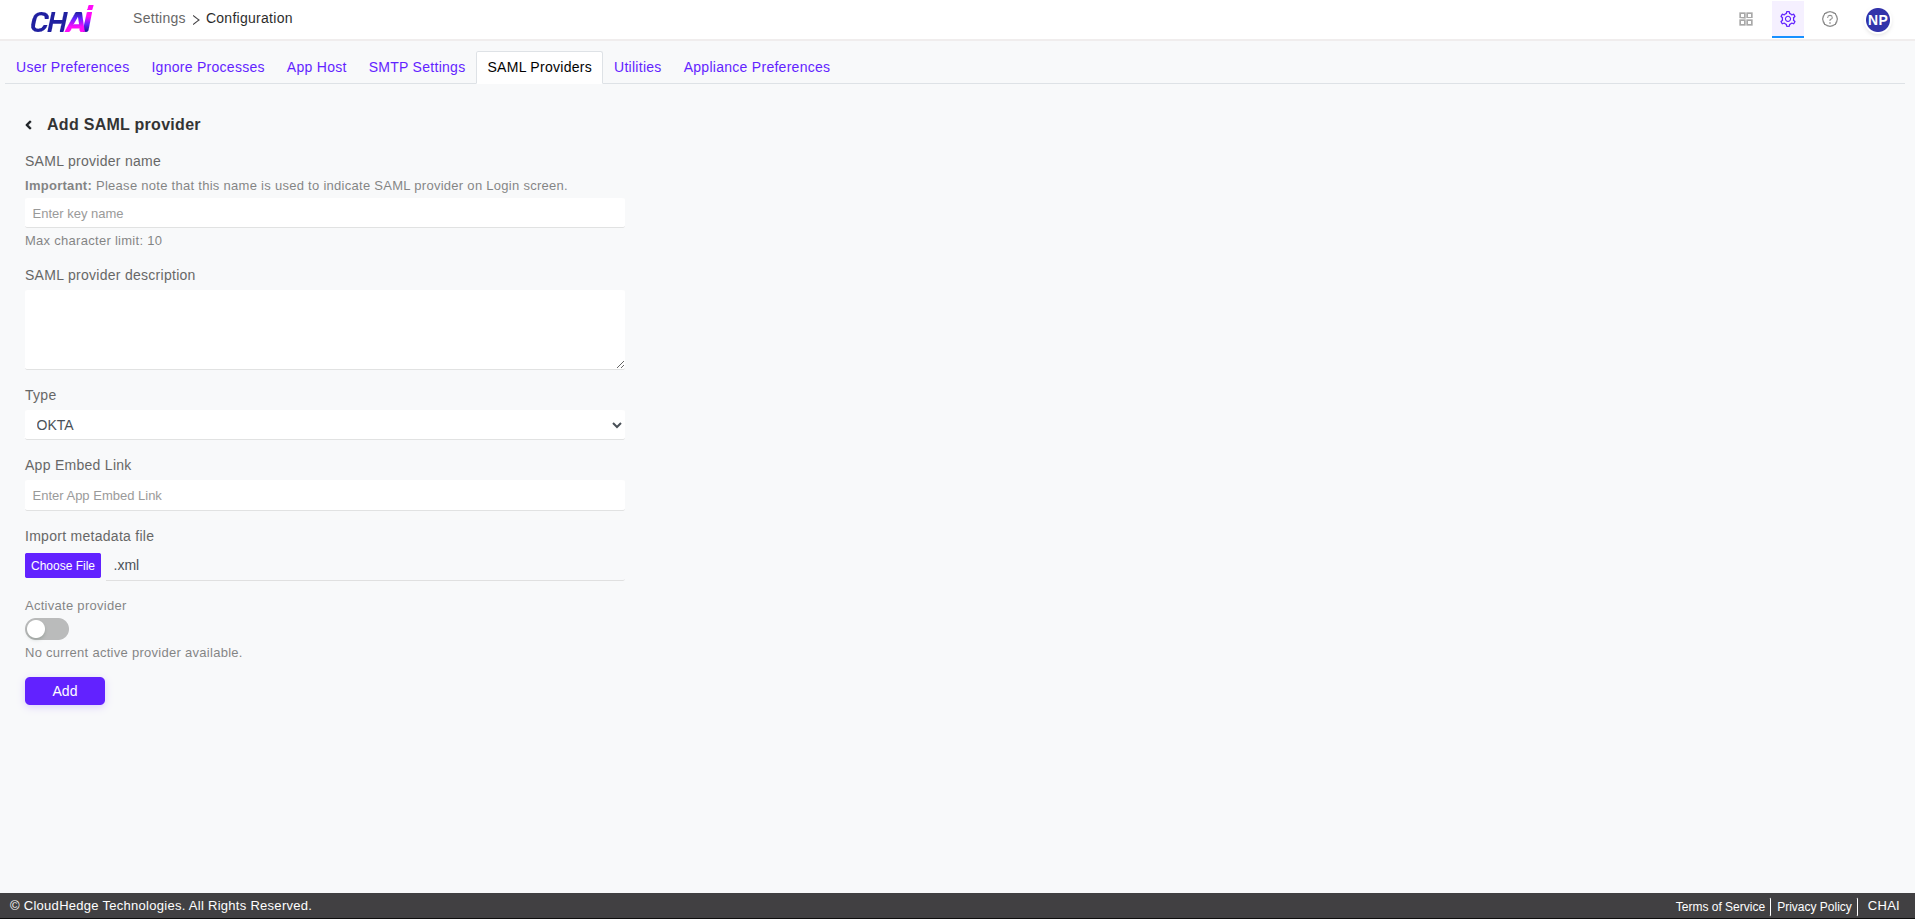
- Click on +Add SAML provider, the form will open as shown in the image below.
-
Please make sure to enter valid provider name which contains:
-
Maximum of 10 characters
- Alphanumeric characters (0-9, a-z, A-Z) and (-_)
-
Name will be shown on Login page
-
Please enter the description
-
Select the identity provider type
Okta
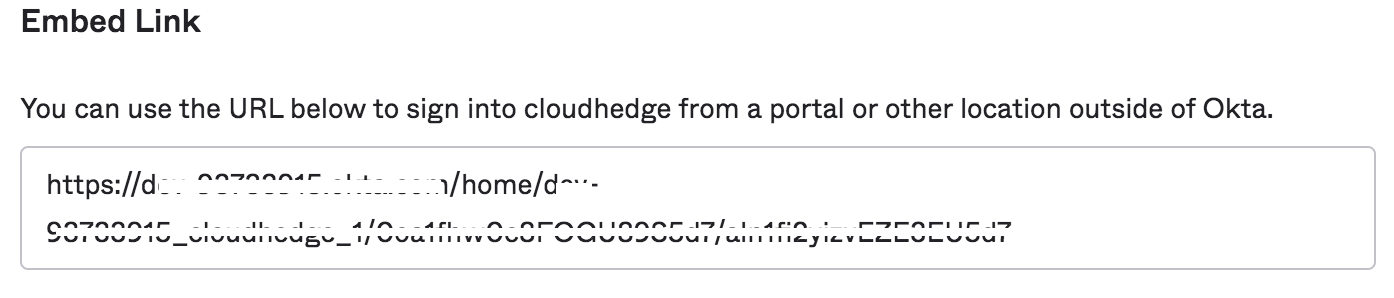
- Please enter the app embed link from okta. Login to okta account -> Click on Application -> Click on Application -> Go to General tab and copy the App Embed Link.
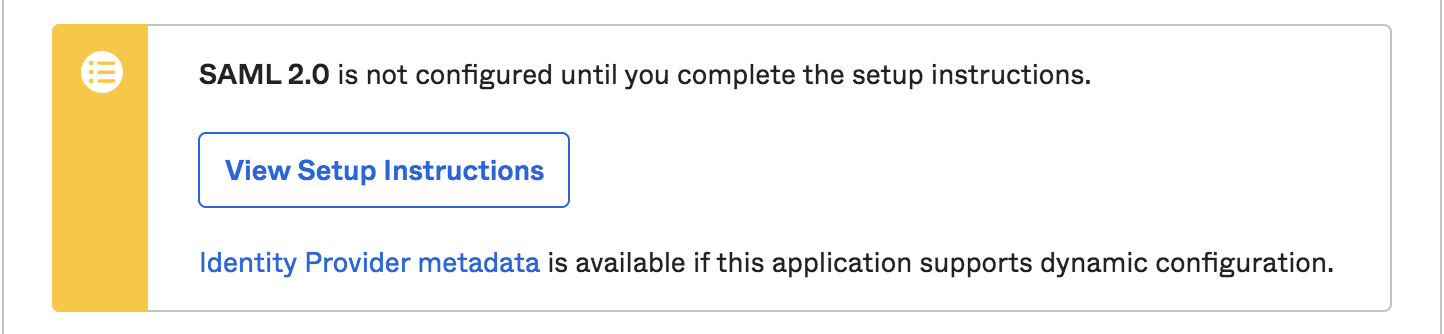
- Import the metadata file. Login to okta account -> Click on Application -> Click on Application -> Go to Sign On tab and click or download the Identity Provider metadata.
- Click on Add button to save the SAML provider configuration.
Microsoft Entra ID
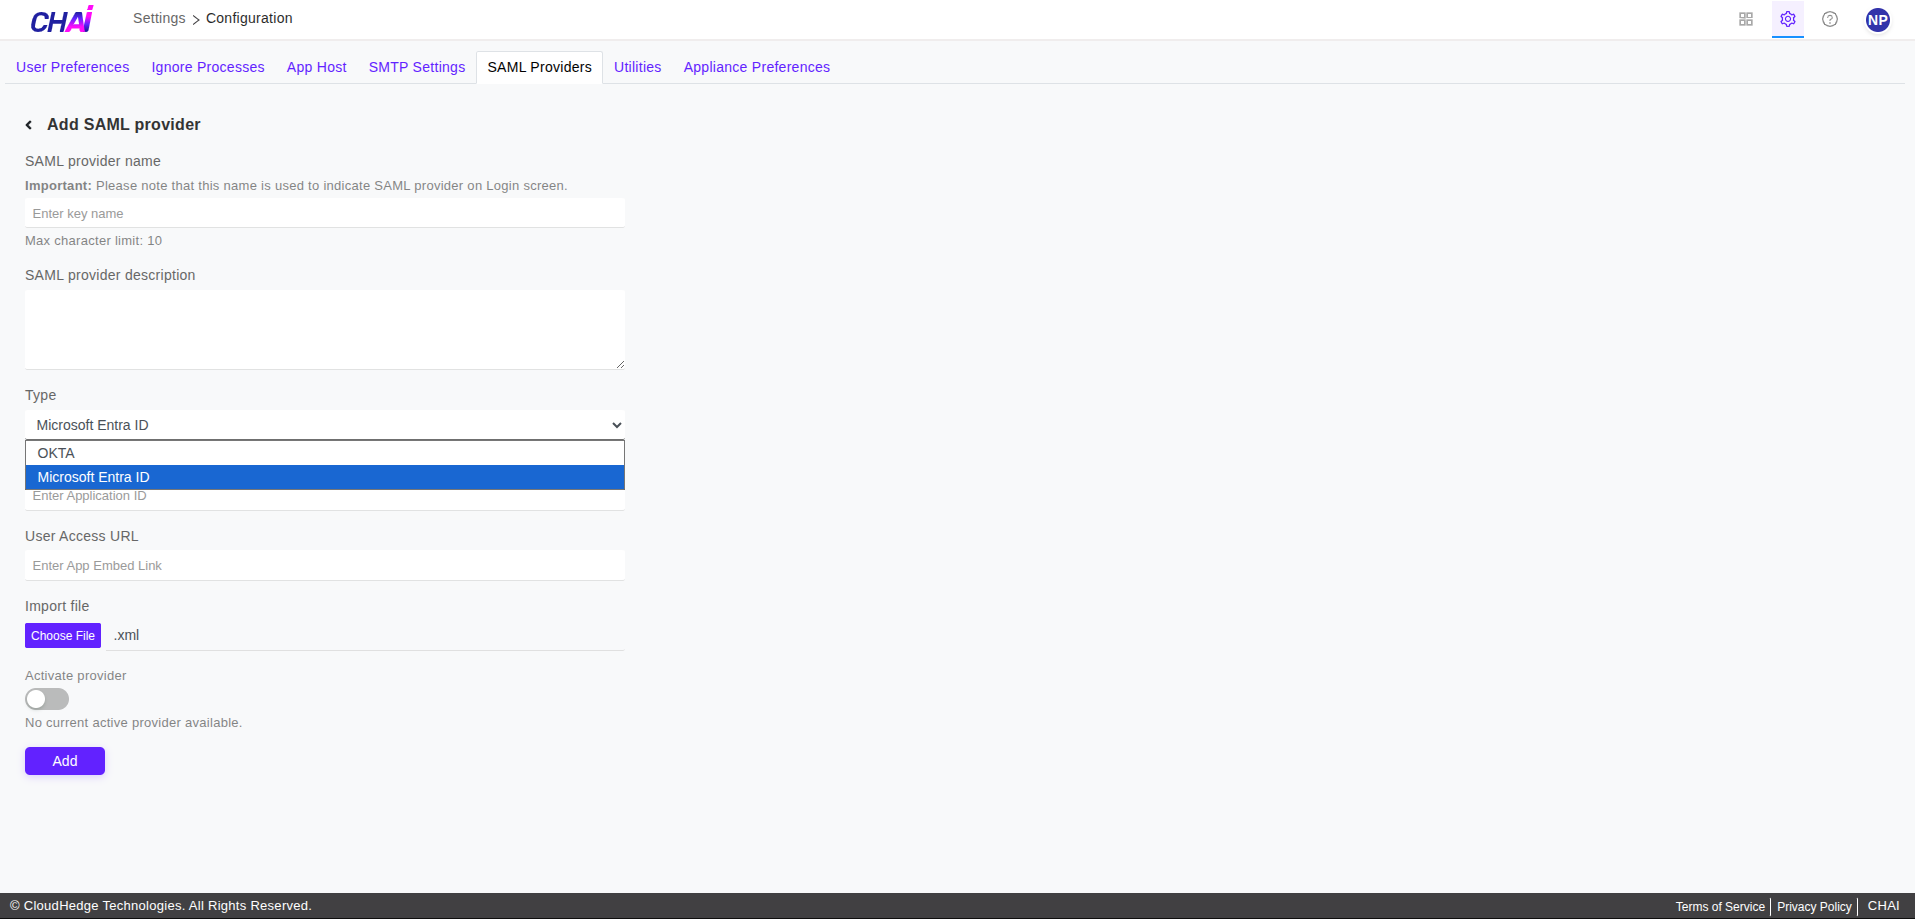
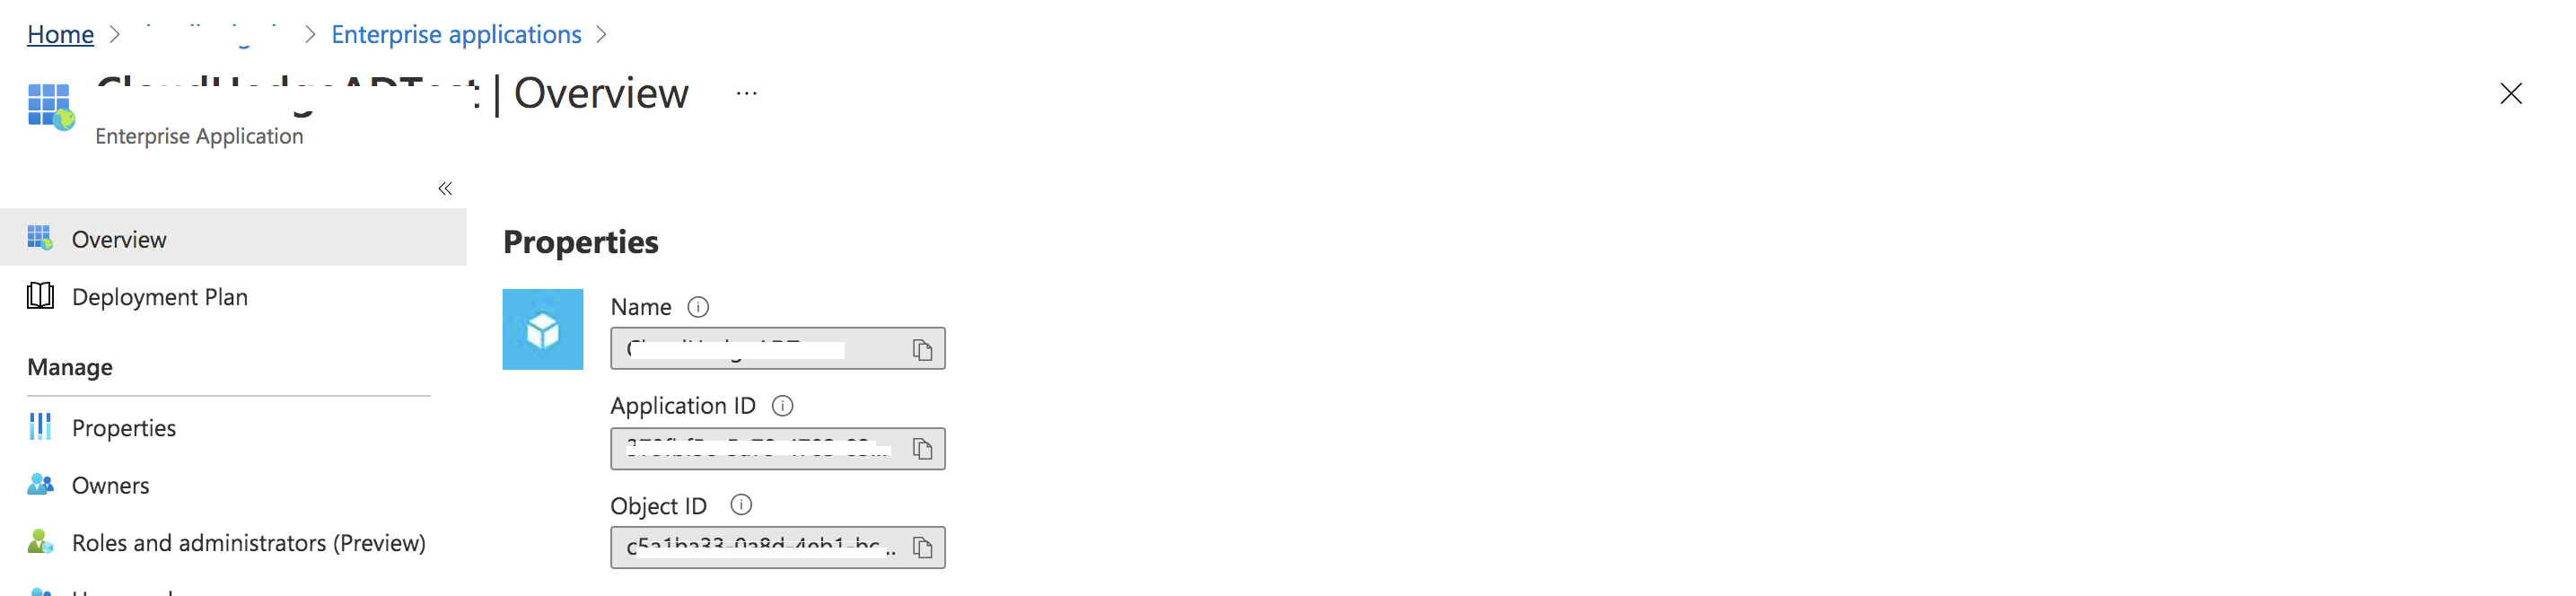
- Please enter the application Id. Login to Azure account -> Click on Azure Microsoft Entra ID -> Enterprise applications -> Select and Click on your Application -> Go on Overview and Copy the application Id.
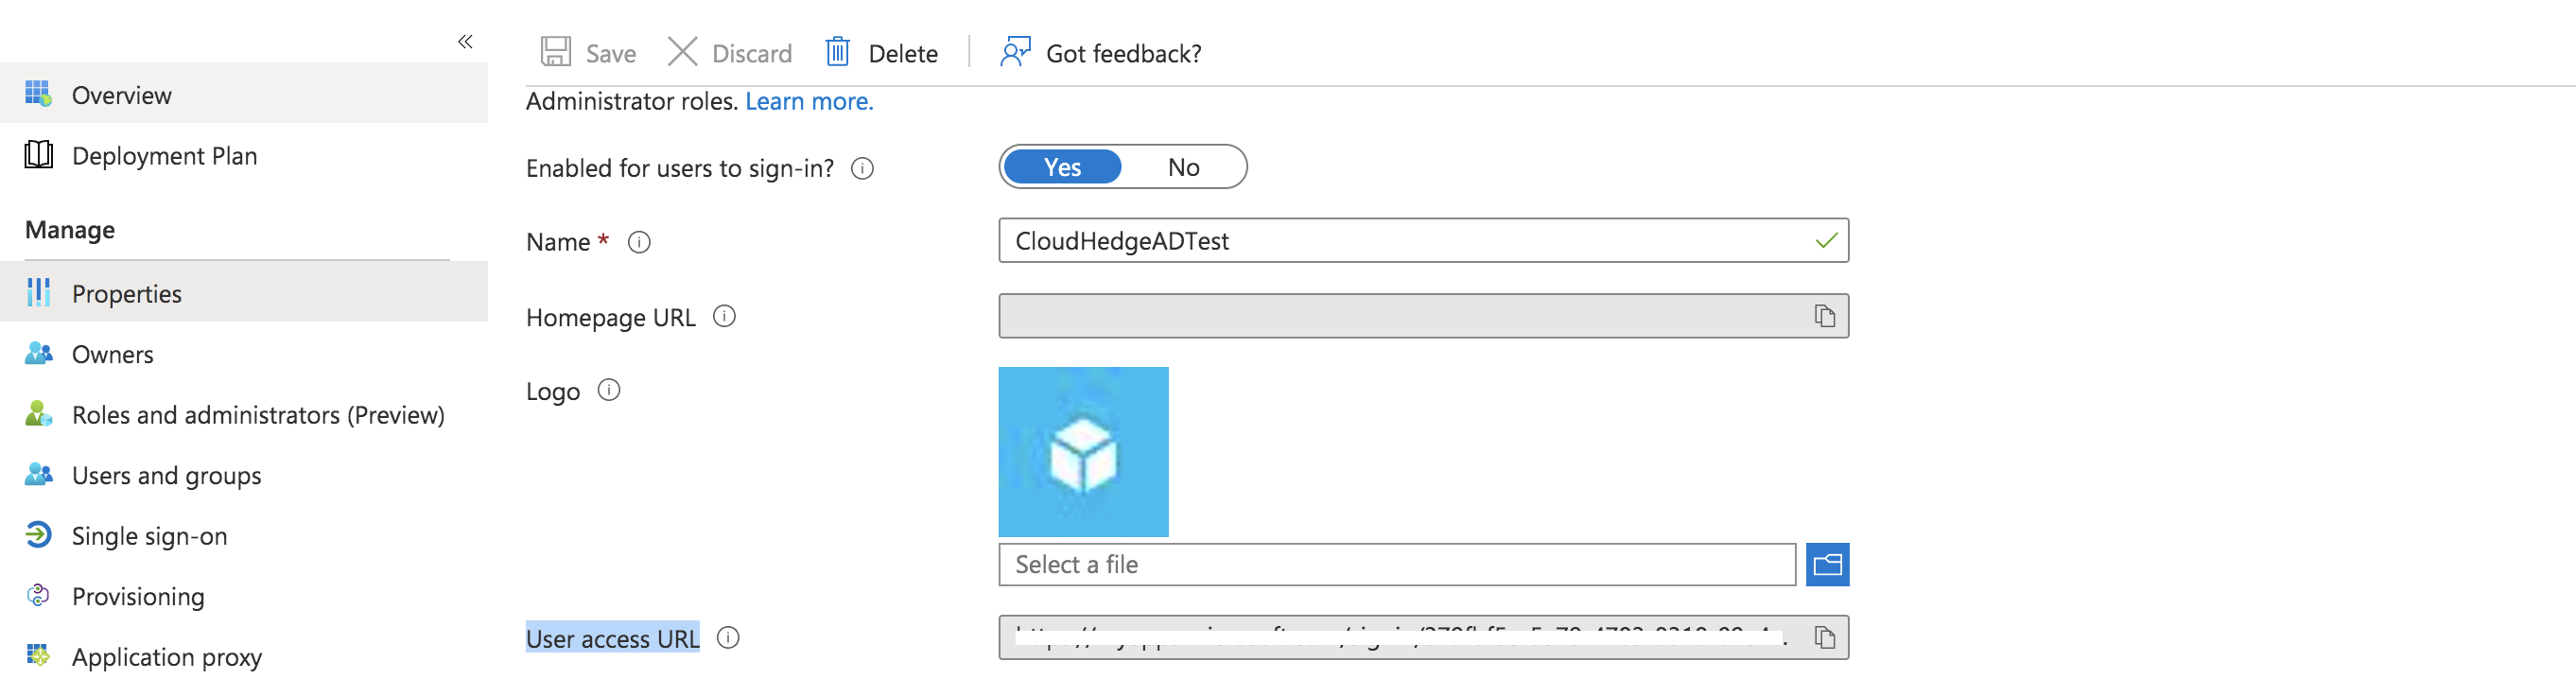
- Enter user access url. Login to Azure account -> Click on Azure Microsoft Entra ID -> Enterprise applications -> Select and Click on your Application -> Go on Properties and Copy user access URL.
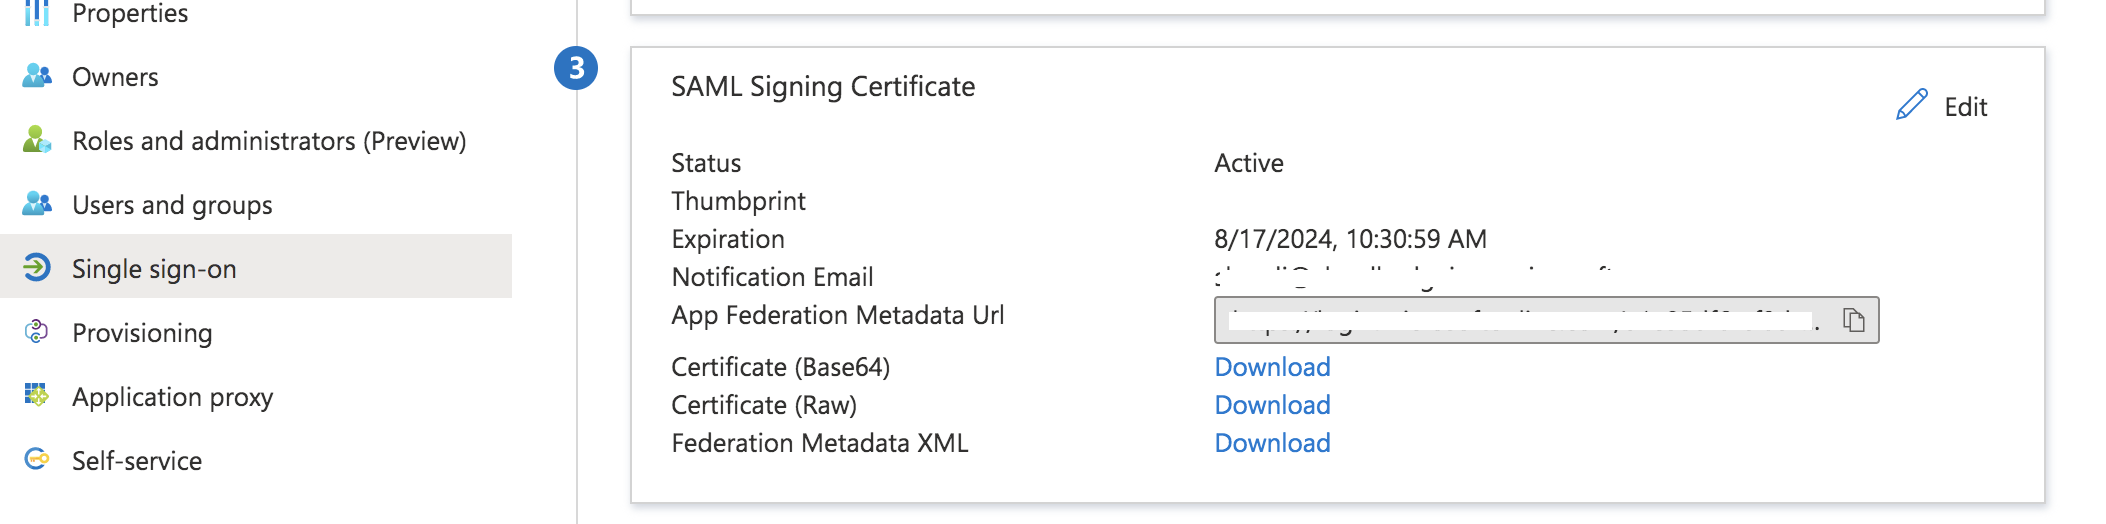
- Select the Import the file. Click on Azure Microsoft Entra ID -> Enterprise applications -> Select and Click on your Application -> Click on Single sign-on and download the Federation Metadata XML.
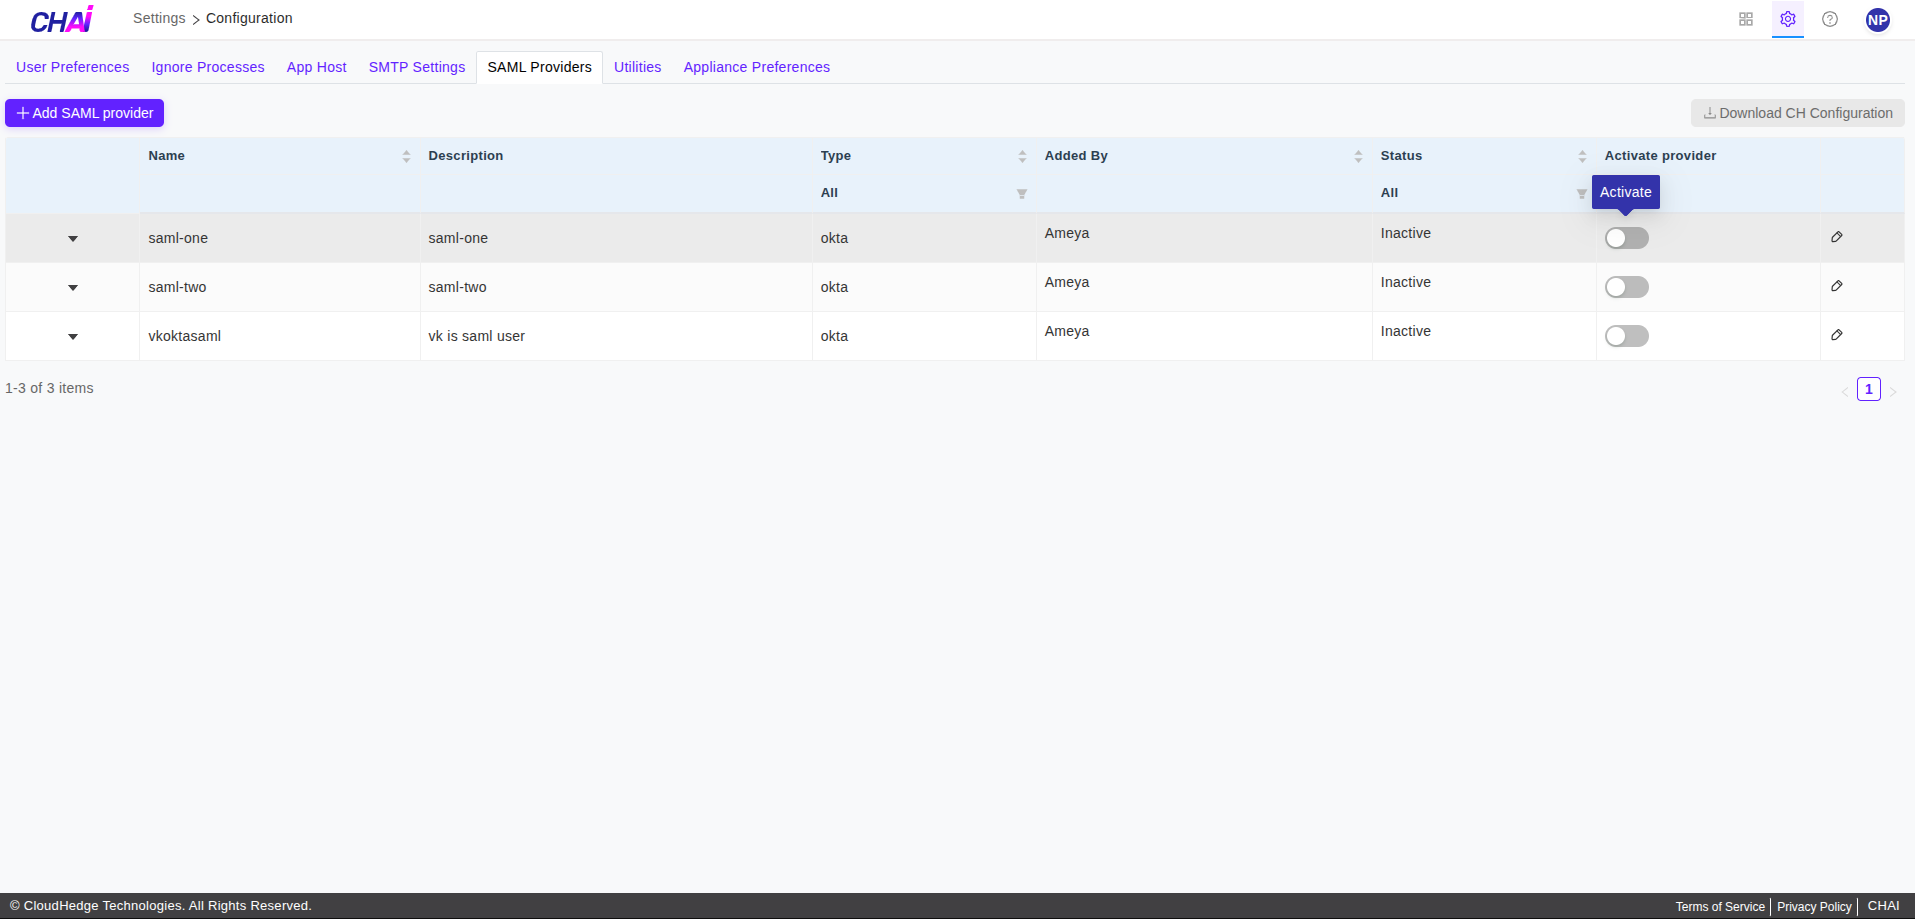
View, Edit and Activate Provider
-
User can perform actions like
-
View
- Edit
-
Activate Provider
-
Click on any of the desired action button to perform actions on respective provider. As shown in below image.
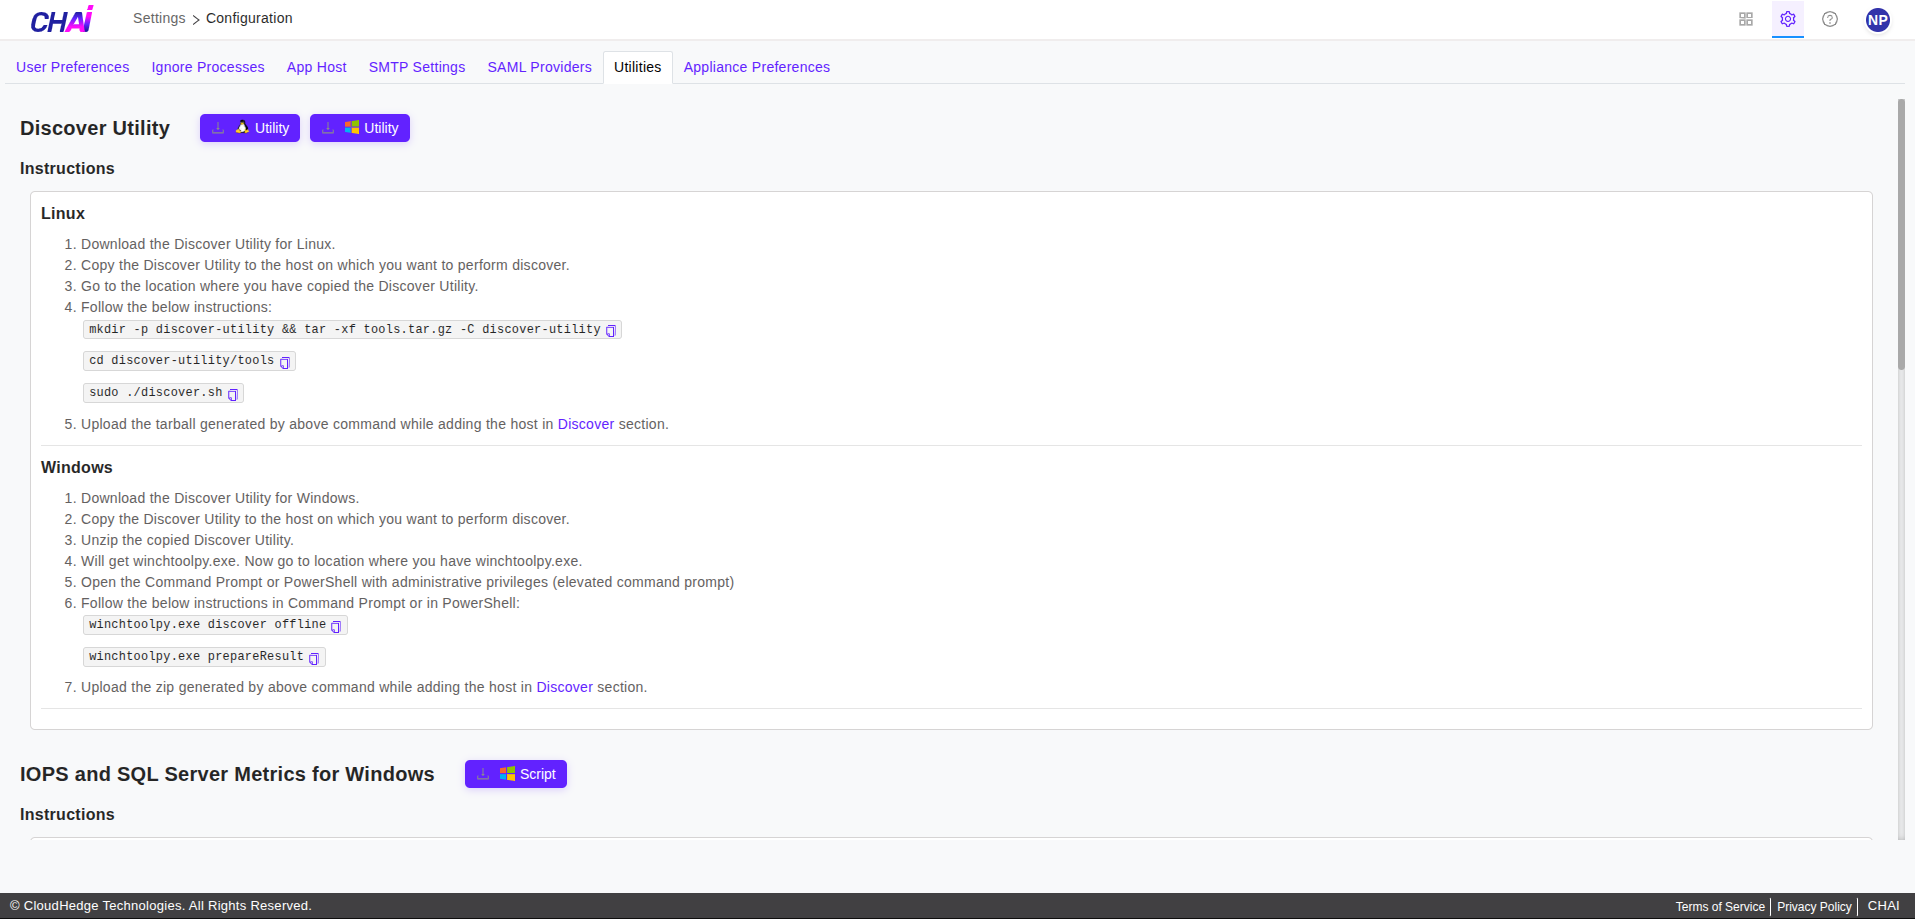
Discover Utility
Discover Utility contains Discover Utility for Windows and Linux using which you can generate discovery data of the host.
Download Discover Utility
-
As shown in the image below, two buttons are available to download Discover utility for Linux and Windows.
-
When you click on
Download Linux Discover Utility, it will downloadtools.tar.gzfile. -
When you click on
Download Windows Discover Utility, it will downloadwinchtoolpy.zipfile. -
Note: If download gives a network error, then resume download again.
Instructions to Generate Discovery Data from Discover Utility
Linux
- Download the Discover Utility for Linux.
- Copy the Discover Utility to the host on which you want to perform discover.
- Go to the location where you have copied the Discover Utility.
- Follow the below instructions:
$ mkdir -p discover-utility && tar -xf tools.tar.gz -C discover-utilityy
$ cd discover-utility/tools
$ sudo ./discover.sh
- Upload the tarball generated by above command while adding the host in Discover section.
Windows
- Download the Discover Utility for Windows.
- Copy the Discover Utility to the host on which you want to perform discover.
- Unzip the copied Discover Utility.
- User will get winchtoolpy.exe. Now go to location where you have winchtoolpy.exe.
- Open the Command Prompt or PowerShell with administrative privileges (elevated command prompt)
- Follow the below instructions in Command Prompt or in PowerShell:
- Upload the zip generated by above command while adding the host in Discover section.