CHAI™ Appliance Installation using CHCTL
Recommended Resource Requirements
Operating System Requirement
| OS | Version |
|---|---|
| Ubuntu | 16+ |
| RHEL | 7.6+, 8.x |
Note: In the table below, target directory is the partition where CHAI™ needs to be installed (for example: /opt).
Hardware Requirements
| Resource | CPU | RAM | Disk space |
|---|---|---|---|
| Requirement | 4 cores | 16 GB | 50 GB at target directory /opt and 100 GB for /var |
Prerequisites
Assumptions
Linux User Privileges: - Linux user has privilege permissions
SELinux Configuration: - SELinux is disabled on workstation
Can be verified as:
For reference visit link | Kindly visit your operating system's official guidelines to disable SELinux
Docker and Docker-Compose: - Docker and Docker-Compose are installed
Can be verified as:
If not installed, you can refer to Docker's Official Documentation.
For reference, visit the link to install Docker and Docker-Compose.
Installation Steps
Step 1: Download the CHAI™ Installation Package from AWS S3
Download the singlefile.tar.gz file using the signed URL. The URL will be provided by the CHAI™ team. Please note the URL is time-bound. Click on URL and the download will start automatically, else you can download it using the command-line utility like wget.
Example to download the singlefile.tar.gz using wget command:
Note: Keep the single quotes around the URL as shown: '<Provided-URL>'
Step 2: Extract singlefile.tar.gz
Run the following command to extract the downloaded file:
Run the following command and verify that it has created the following files in the same directory:
Expected output:
-rw-r--r-- 1 cloudhedge cloudhedge   12705712 Jun 26 05:41 chaik8s-x64
-rw-r--r-- 1 cloudhedge cloudhedge   14265923 Jun 26 05:14 chctl_linux
-rw-r--r-- 1 cloudhedge cloudhedge   49039003 Jun 26 05:41 chai-mcp-server-linux
-rw-r--r-- 1 cloudhedge cloudhedge  153635885 Jun 26 08:27 chai-x64
-rw-r--r-- 1 cloudhedge cloudhedge  182257873 Jun 26 11:08 chai-report-builder.tar.gz
-rw-r--r-- 1 cloudhedge cloudhedge       5739 Jun 26 09:52 compose.yaml
-rw-r--r-- 1 cloudhedge cloudhedge     133498 Jun 26 09:52 cloudhedge-db-setup-appliance.js
-rw-r--r-- 1 cloudhedge cloudhedge       6108 Jun 26 09:52 chctl-compose.yaml
-rw------- 1 cloudhedge cloudhedge 5365915136 Jun 26 09:57 containers.tar
-rw-r--r-- 1 cloudhedge cloudhedge       3582 Jun 26 09:57 cloudhedgeenv
-rw-rw-r-- 1 cloudhedge cloudhedge 2305464183 Jun 26 10:02 singlefile.tar.gz
Step 3: Getting the CHCTL to Work
Move CHCTL Binary (named chctl_linux) to /bin/chctl directory and provide executable permission:
Run below command to verify if you can run chctl:
Expected output (version can be newer than shown):
Step 4: Setup CHAI™
Run the following command to install appliance:
Note: By default the above command will install the appliance in /opt/appliance directory. If you want to install at a different location, you can specify the location using --target-directory flag.
Actions Performed in the Backend
The setup command performs the following actions:
- Verification of Docker and Docker-Compose installation
- Creation of targeted directory structure
- Loading of required Docker containers into the memory. You can skip this operation by using
--skip-load-containerparameter in setup command, if containers are already loaded - Setting up database and seeding of the minimal required data. You can skip this operation by using
--skip-db-setupparameter in the setup command, if DB setup is already done
Start CHAI™
Step 5: Start the Appliance
After successfully setting up appliance, you need to start it. Start it by running the following command:
Step 6: Verify the Appliance
Post-Installation
Access the Application
Access the application via any Web Browser (Google Chrome is Recommended):
Login with Default Credentials
Login using default username and password:
Important: Change this password on first login for security purposes.
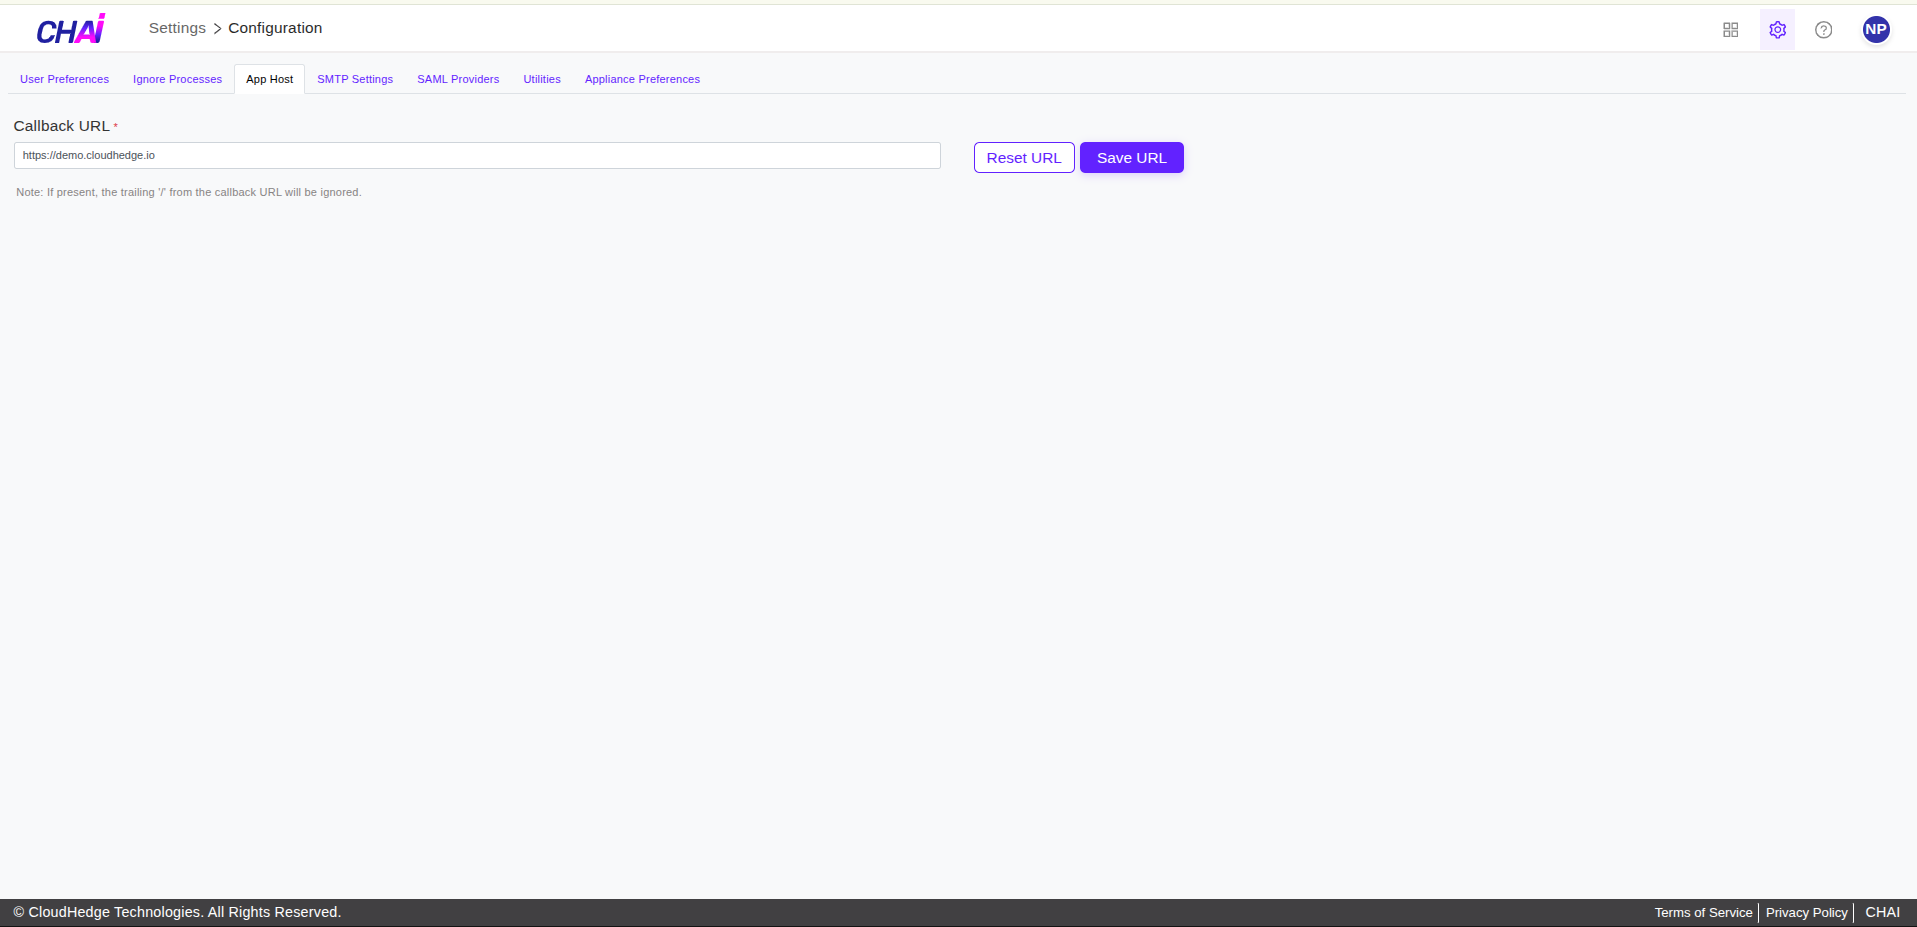
Update the App Host URL
- On the UI, click on Settings → Configuration
- Open the tab named App Host
- Paste your URL using which you have accessed the appliance UI and click on Save URL button as shown below:
Miscellaneous Commands
| Command | Usage |
|---|---|
sudo chctl setup appliance |
Setup the appliance |
sudo chctl start appliance |
Start appliance |
sudo chctl stop appliance |
Stop appliance |
sudo chctl status appliance |
Check status of the appliance |
sudo chctl patch appliance |
Apply a fix to a specific service |
sudo chctl smoke-test |
Prove a freshly installed appliance works: login, add sample vault, add sample host (creates a project), then list projects and hosts |