Application
A tool to create a semantic group of processes.
What is an Application
Application is a way to group certain processes, preferably belonging to an application that is running on the host. Think of application as a bucket that holds processes.
Need
To create a semantic grouping of processes that can be used to filter processes from a list.
For instance, after running discovery on a host, two processes are found. Out of those, one is a Java process and the other is an Nginx process. Say both these processes are part of an application called ISCRUM. Using application, you can create a bucket that holds these two processes. Using this bucket, you can always find all the processes belonging to the ISCRUM application and perform operations like X-ray on them.
Usage
Applications are defined at a project level and can be used in the Discover feature's process view or Transform feature's process view.
How to Create an Application
The application can be created in the Rationalize page. Let's look at how you can create an application.
Application Name Constraints
- You can create an application with a name having a length up to 15 characters
- Application name can have alphanumeric characters only; no special characters are allowed except hyphens (-) and periods (.)
Steps to Create an Application
Step 1: Login to CHAI™ Portal
Login to the CHAI™ portal.
Step 2: Navigate to Rationalize Tab
Click on the project where you want to create an application and navigate to the Rationalize tab on the left side of the screen.
Step 3: View Rationalize Page
You will be navigated to a screen as shown below.
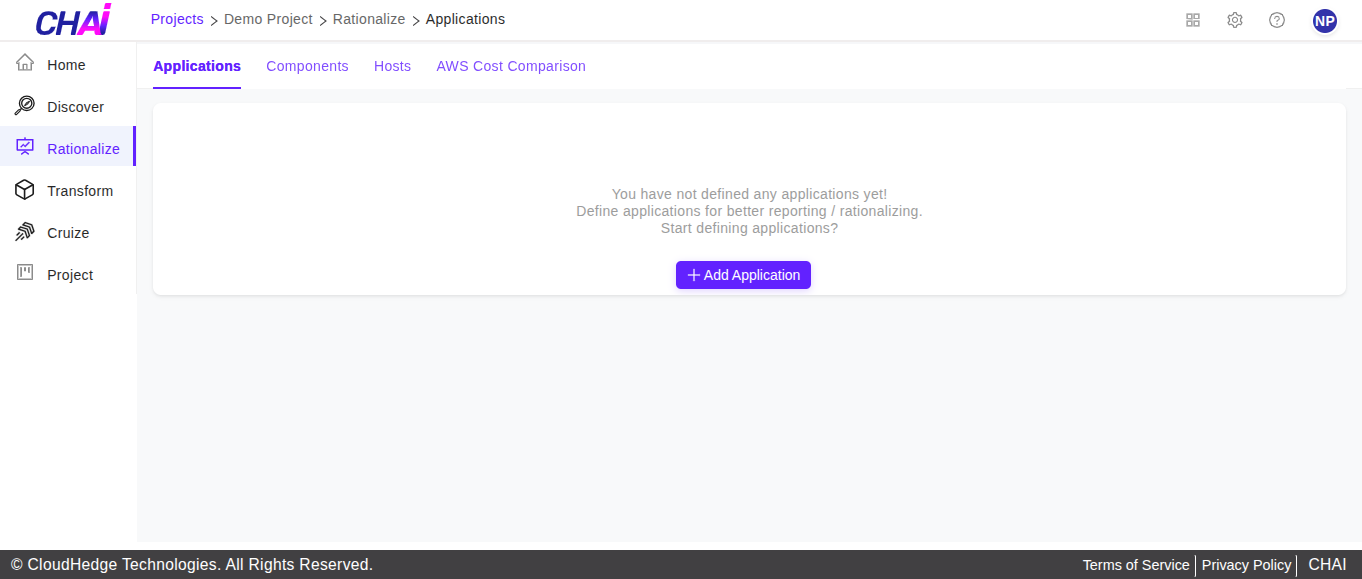
Step 4: Click Add Application
Click the Add Application button.
Step 5: Enter Application Details
The following screen will be displayed to add the relevant details for the application.
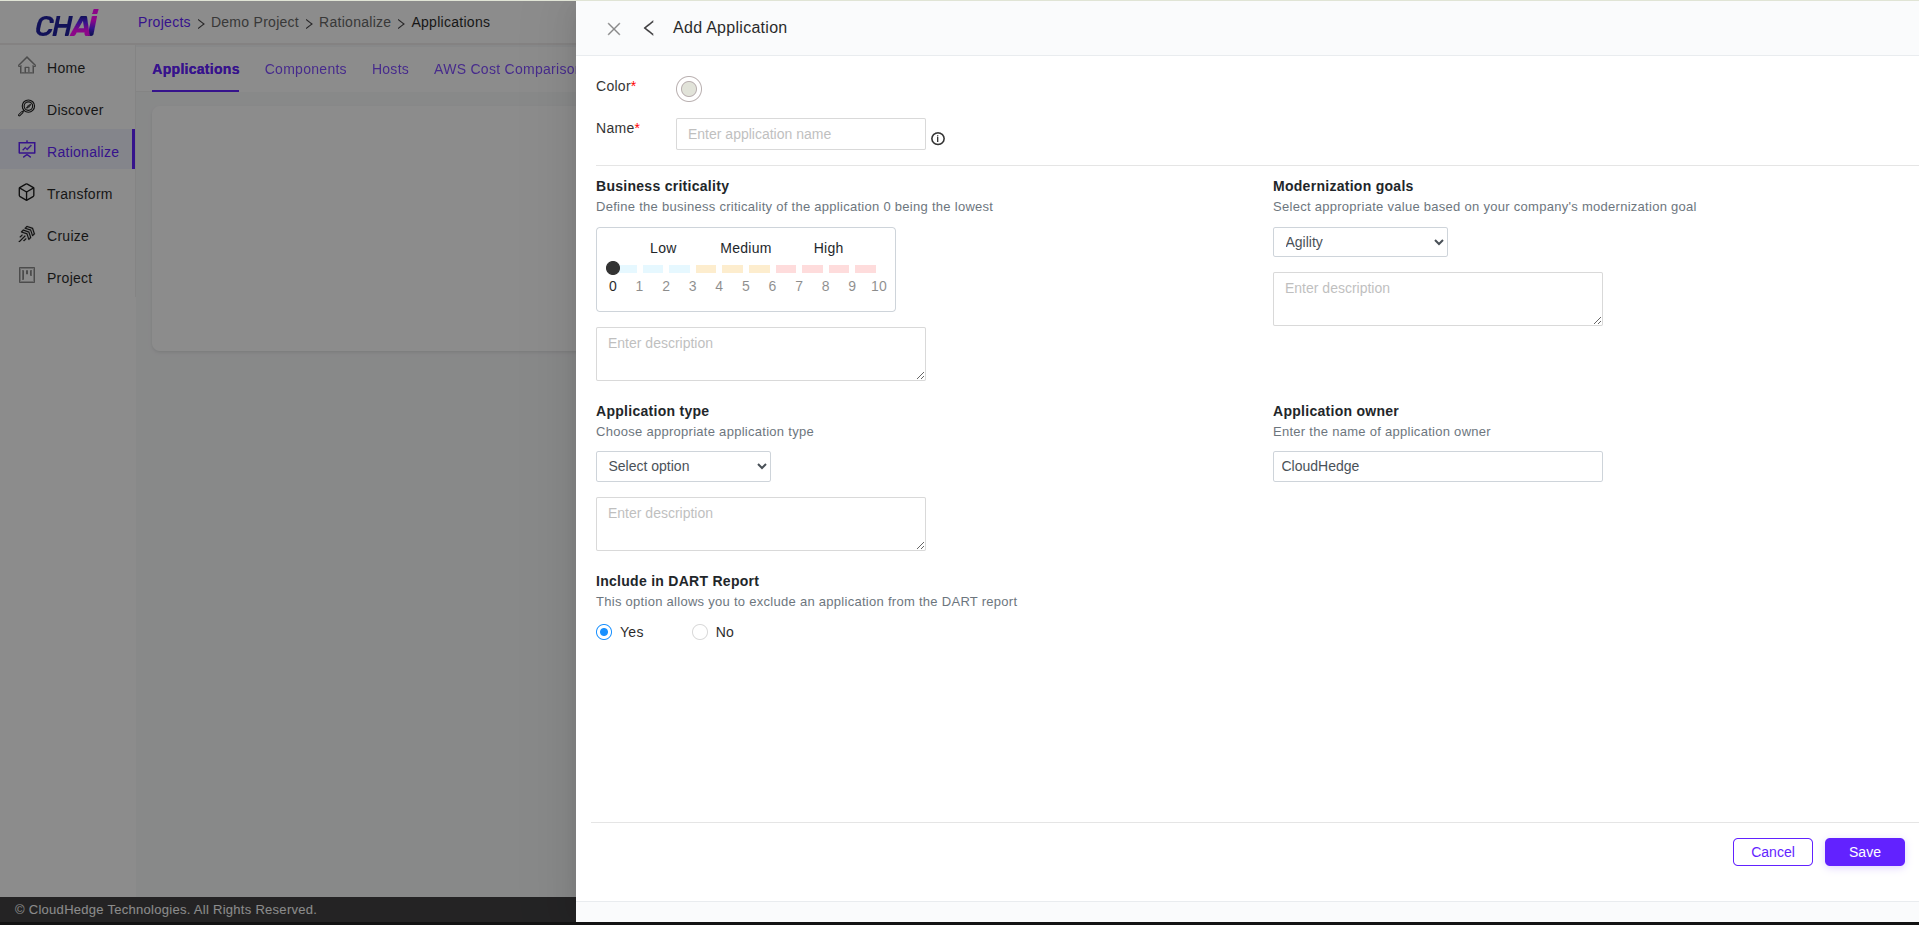
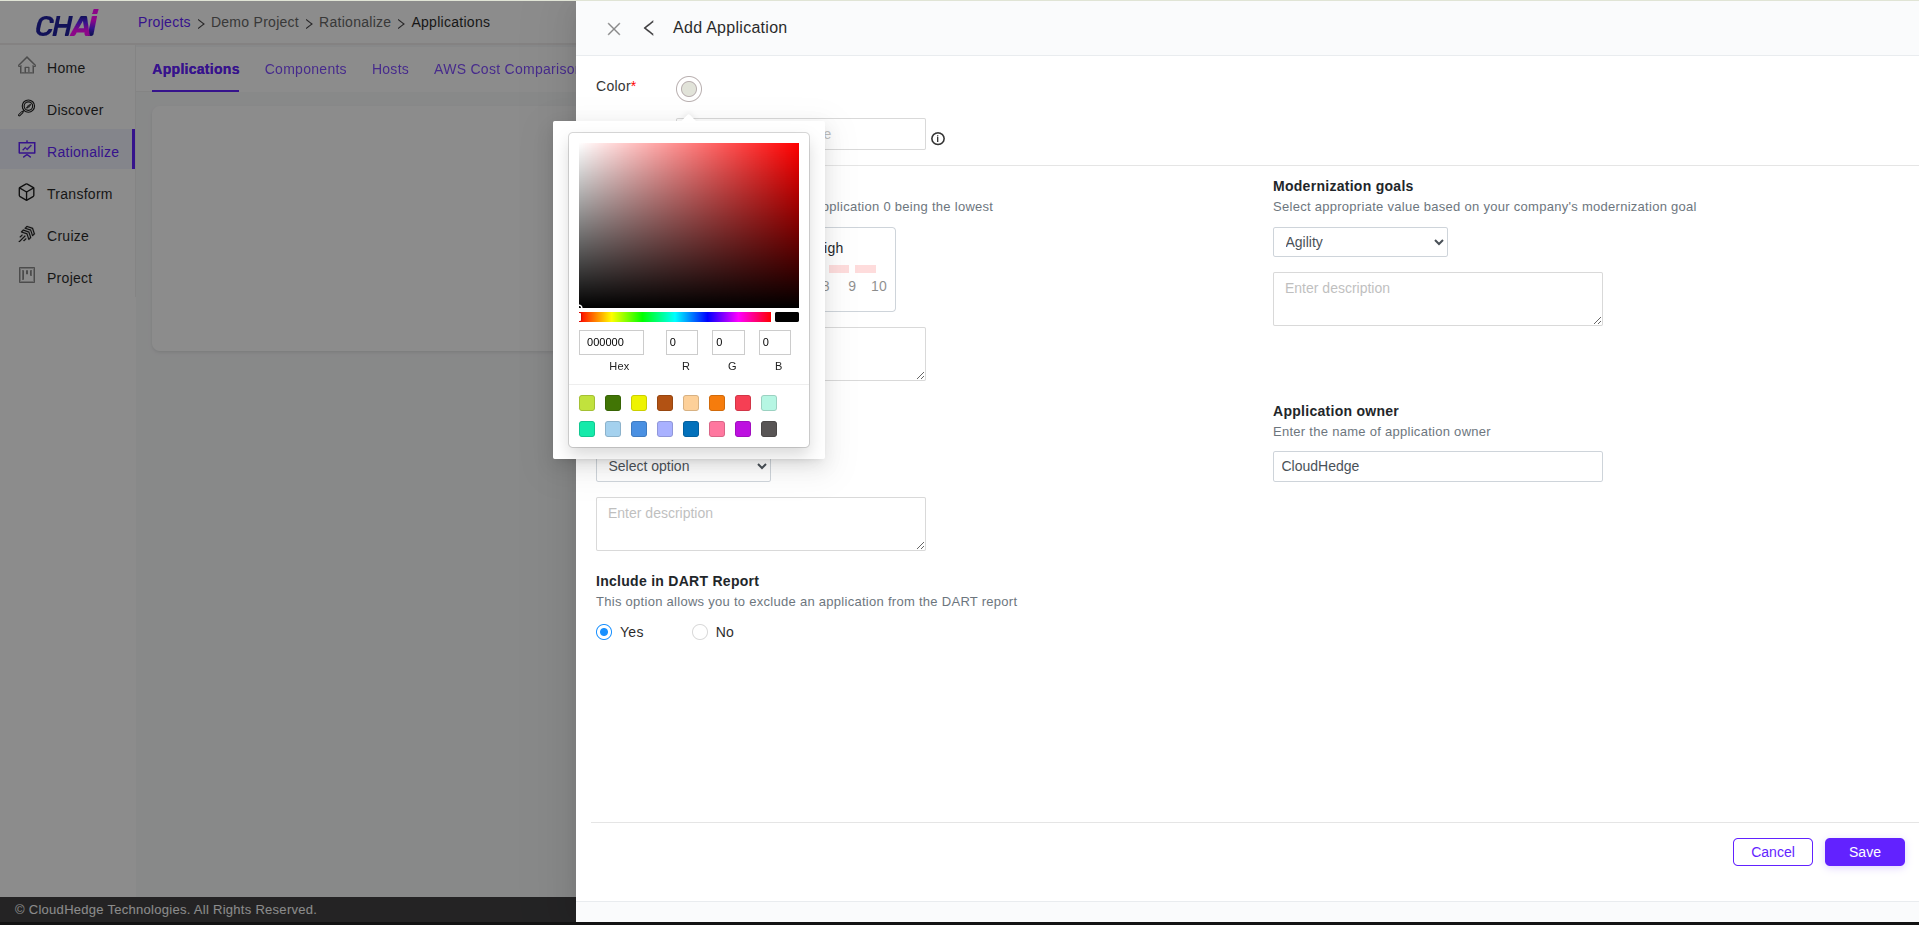
Step 6: Choose Application Color
You can choose the color to associate with the application.
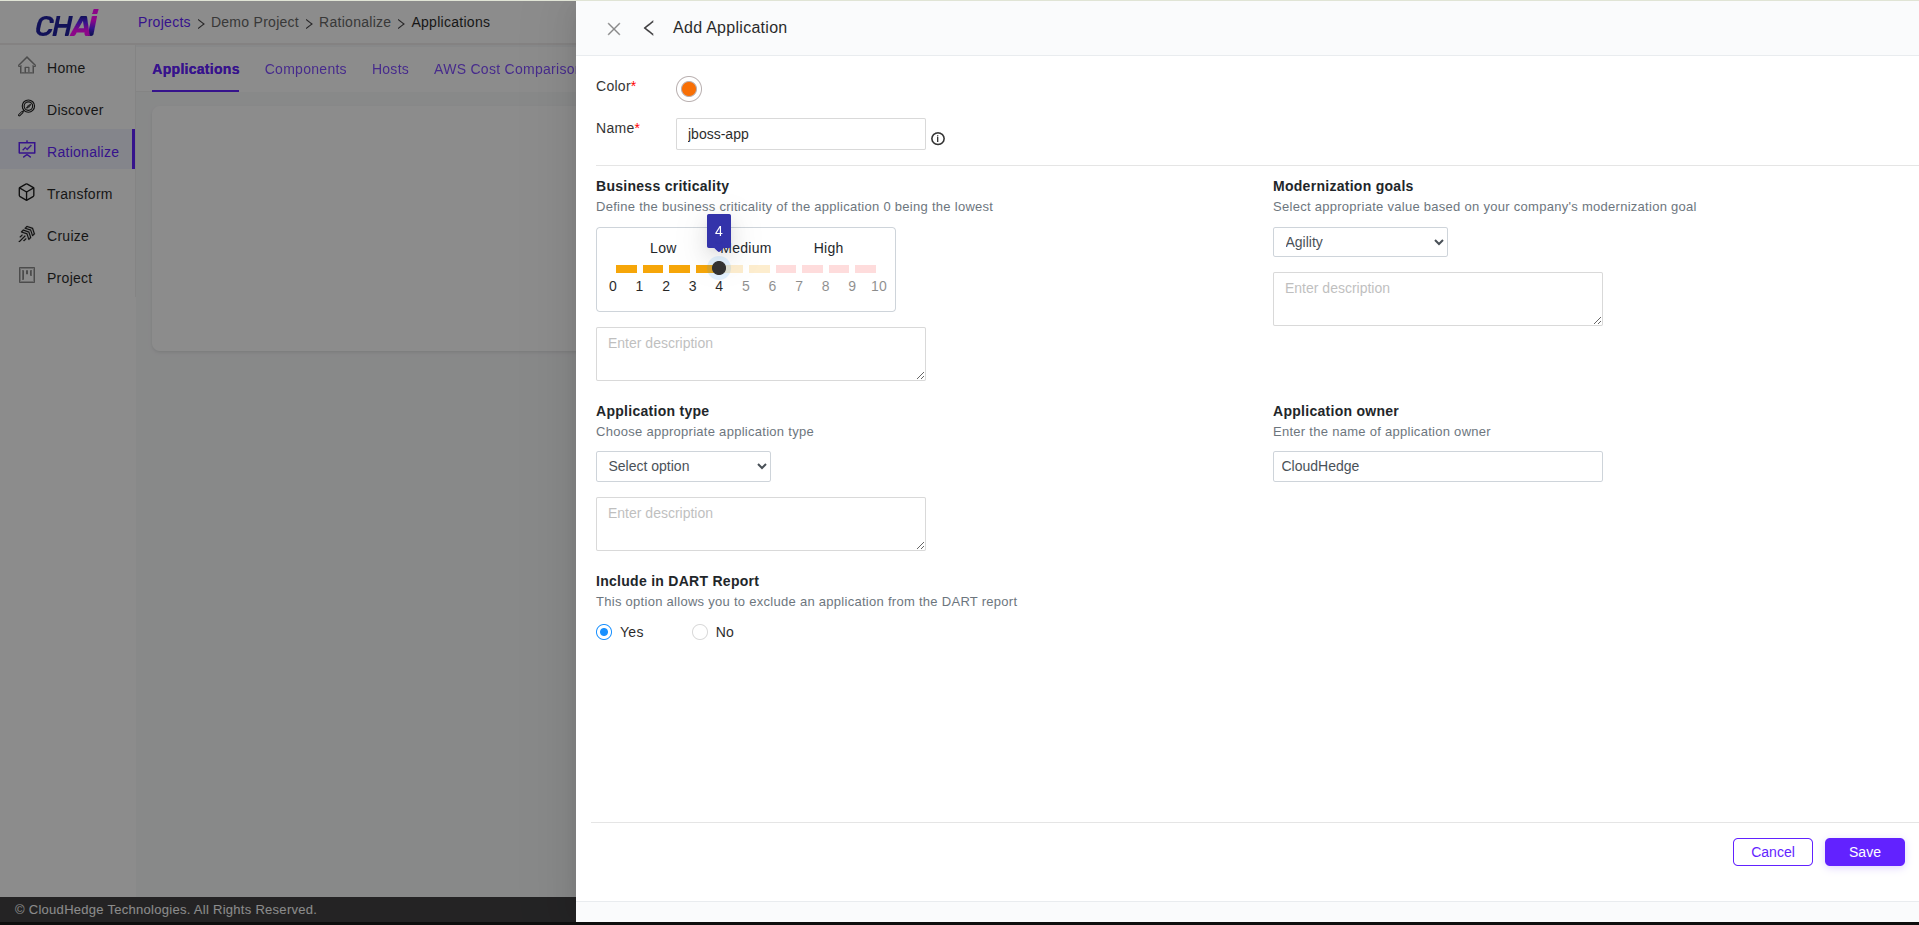
Step 7: Provide Application Name
Provide the name of the application. The application constraints are displayed when you hover over the info icon.

Step 8: Select Business Criticality
Select the business criticality of the application and provide a description for the same.
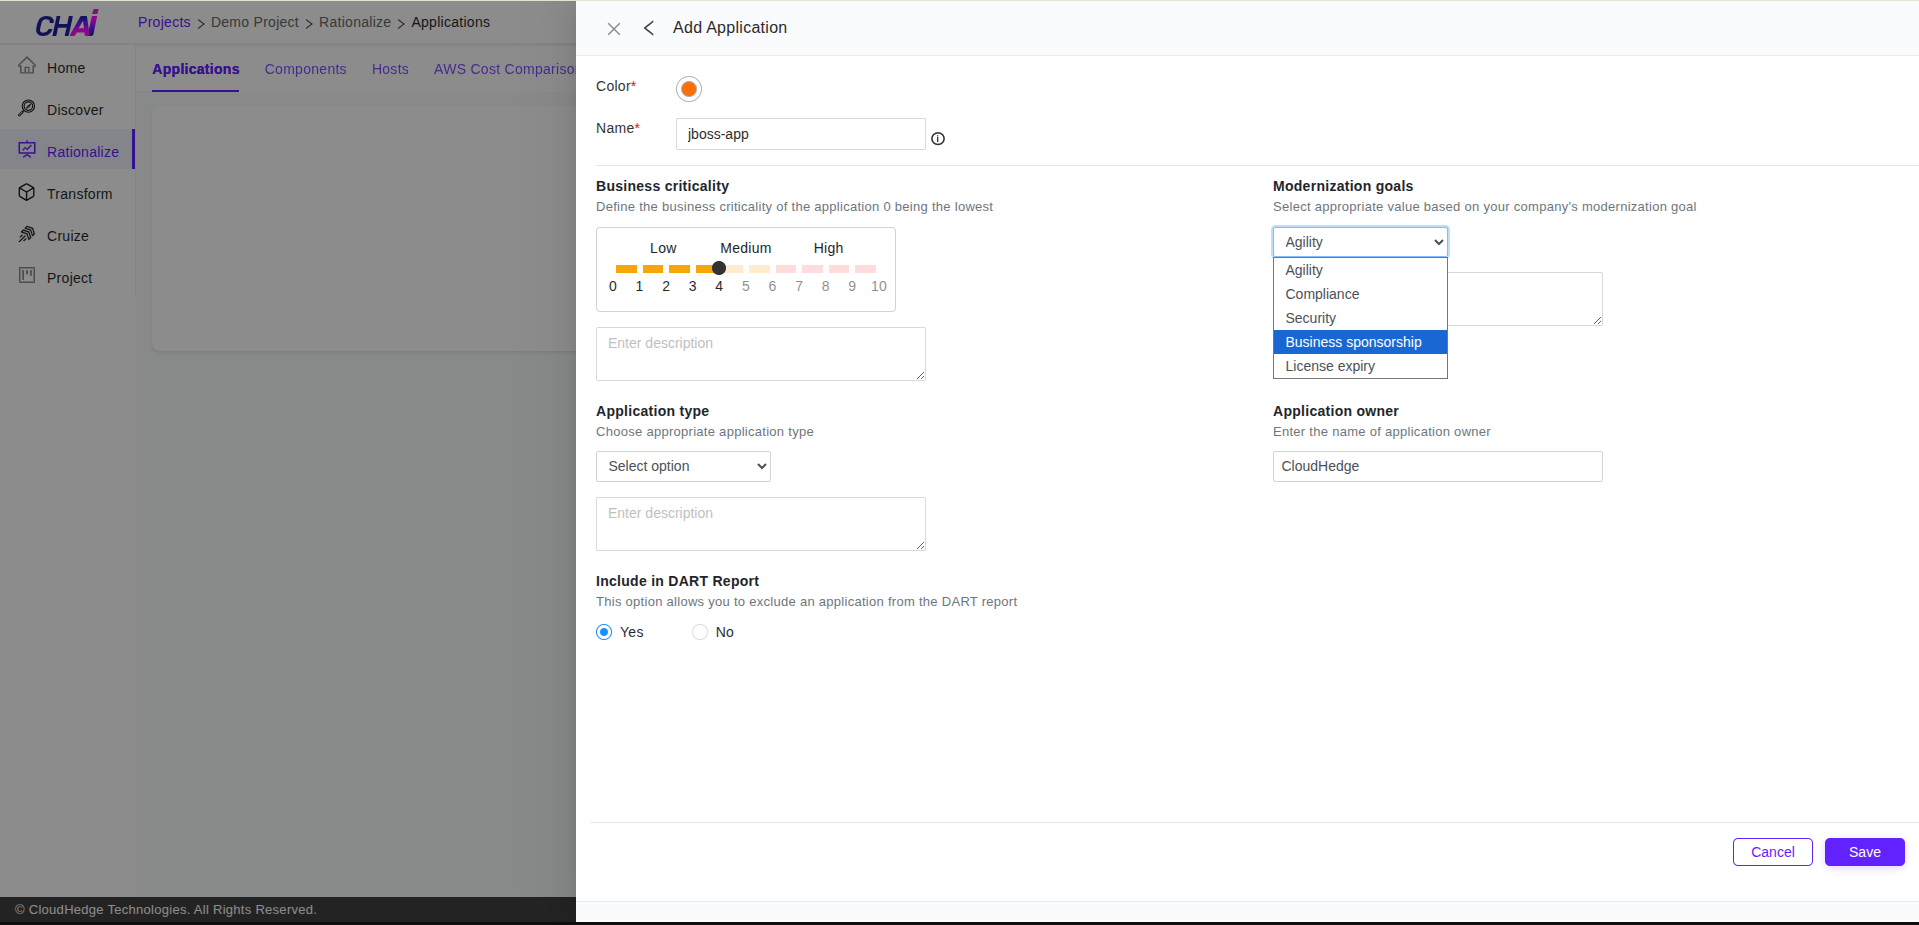
Step 9: Select Modernization Goal
Select the modernization goal of the application and provide a description for the same.
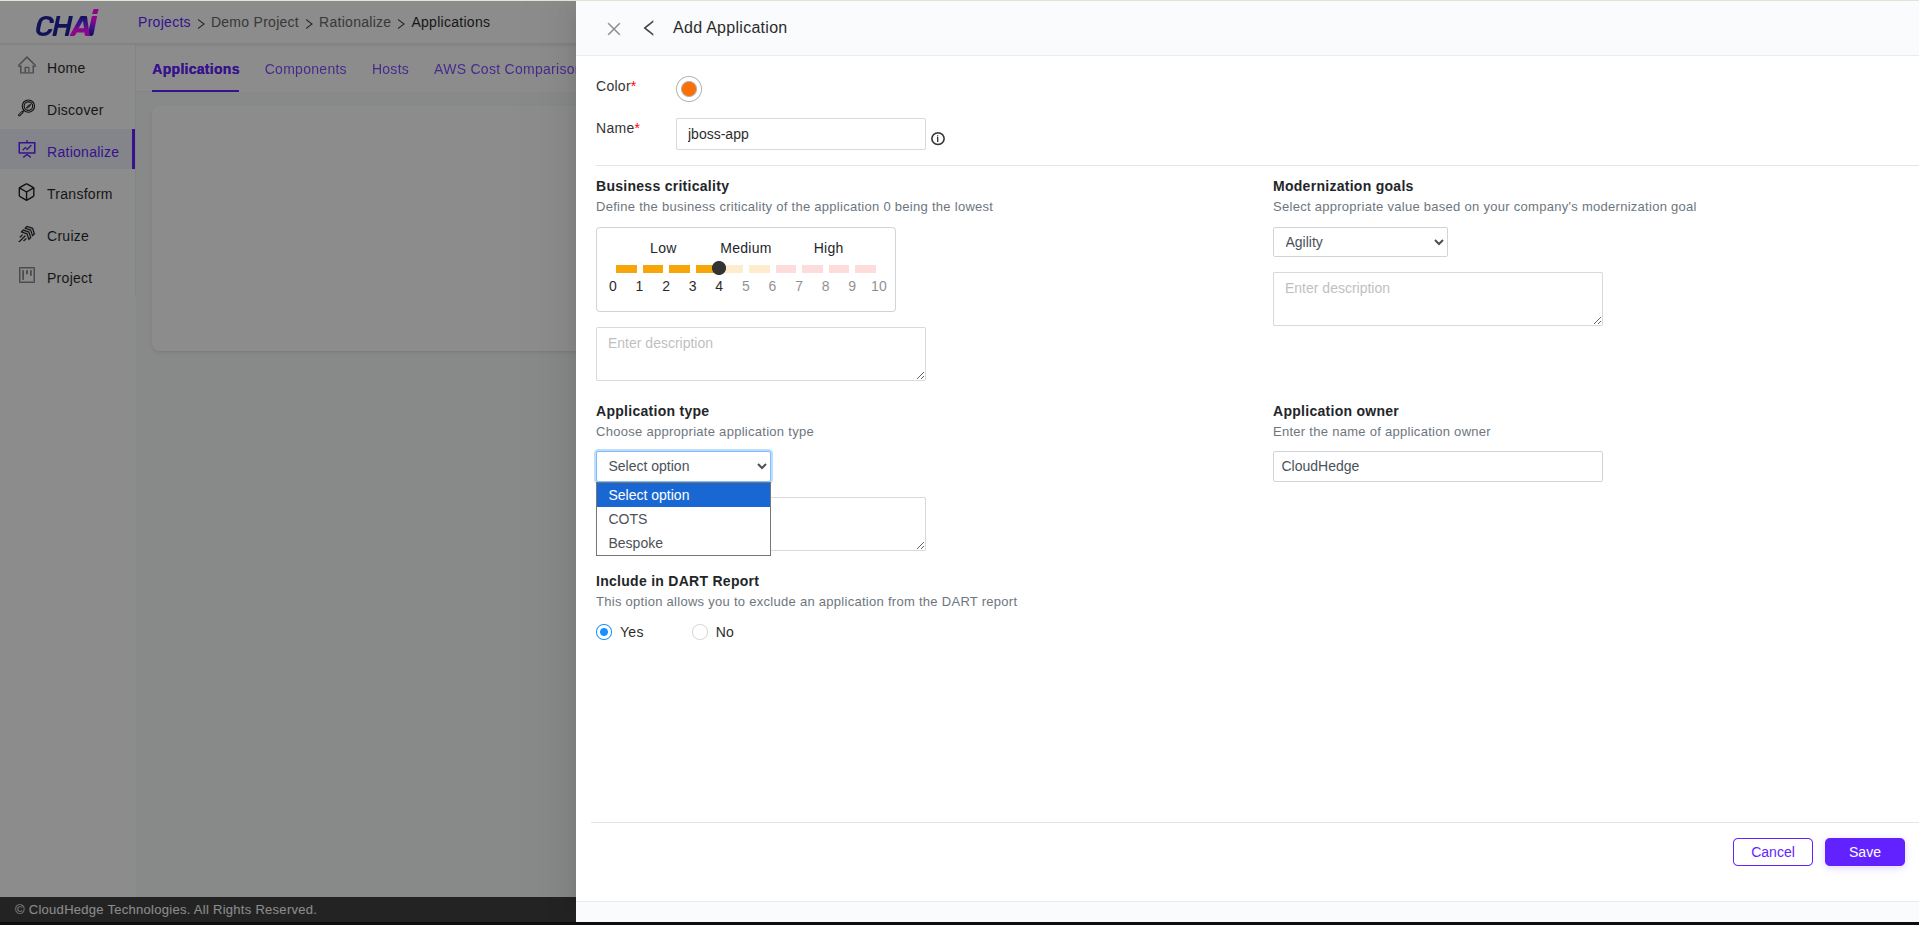
Step 10: Select Application Type
Select the application type of the application and provide a description for the same.
Step 11: Set Application Owner
Your username will be shown as the application owner. You can change the name if the application owner is someone else.

Step 12: Save Application
Once you have added all the details, click the Save button.
Step 13: Verify Creation
The application will be saved. You will be navigated to the Applications page where the created application will be listed, and you will see a success notification.

How to Edit an Application
Step 1: Login to CHAI™ Portal
Login to the CHAI™ portal.
Step 2: Navigate to Rationalize Tab
Click on the project where you want to edit an application and navigate to the Rationalize tab.
Step 3: View Applications List
You will see a list of all the existing applications that you have created previously.
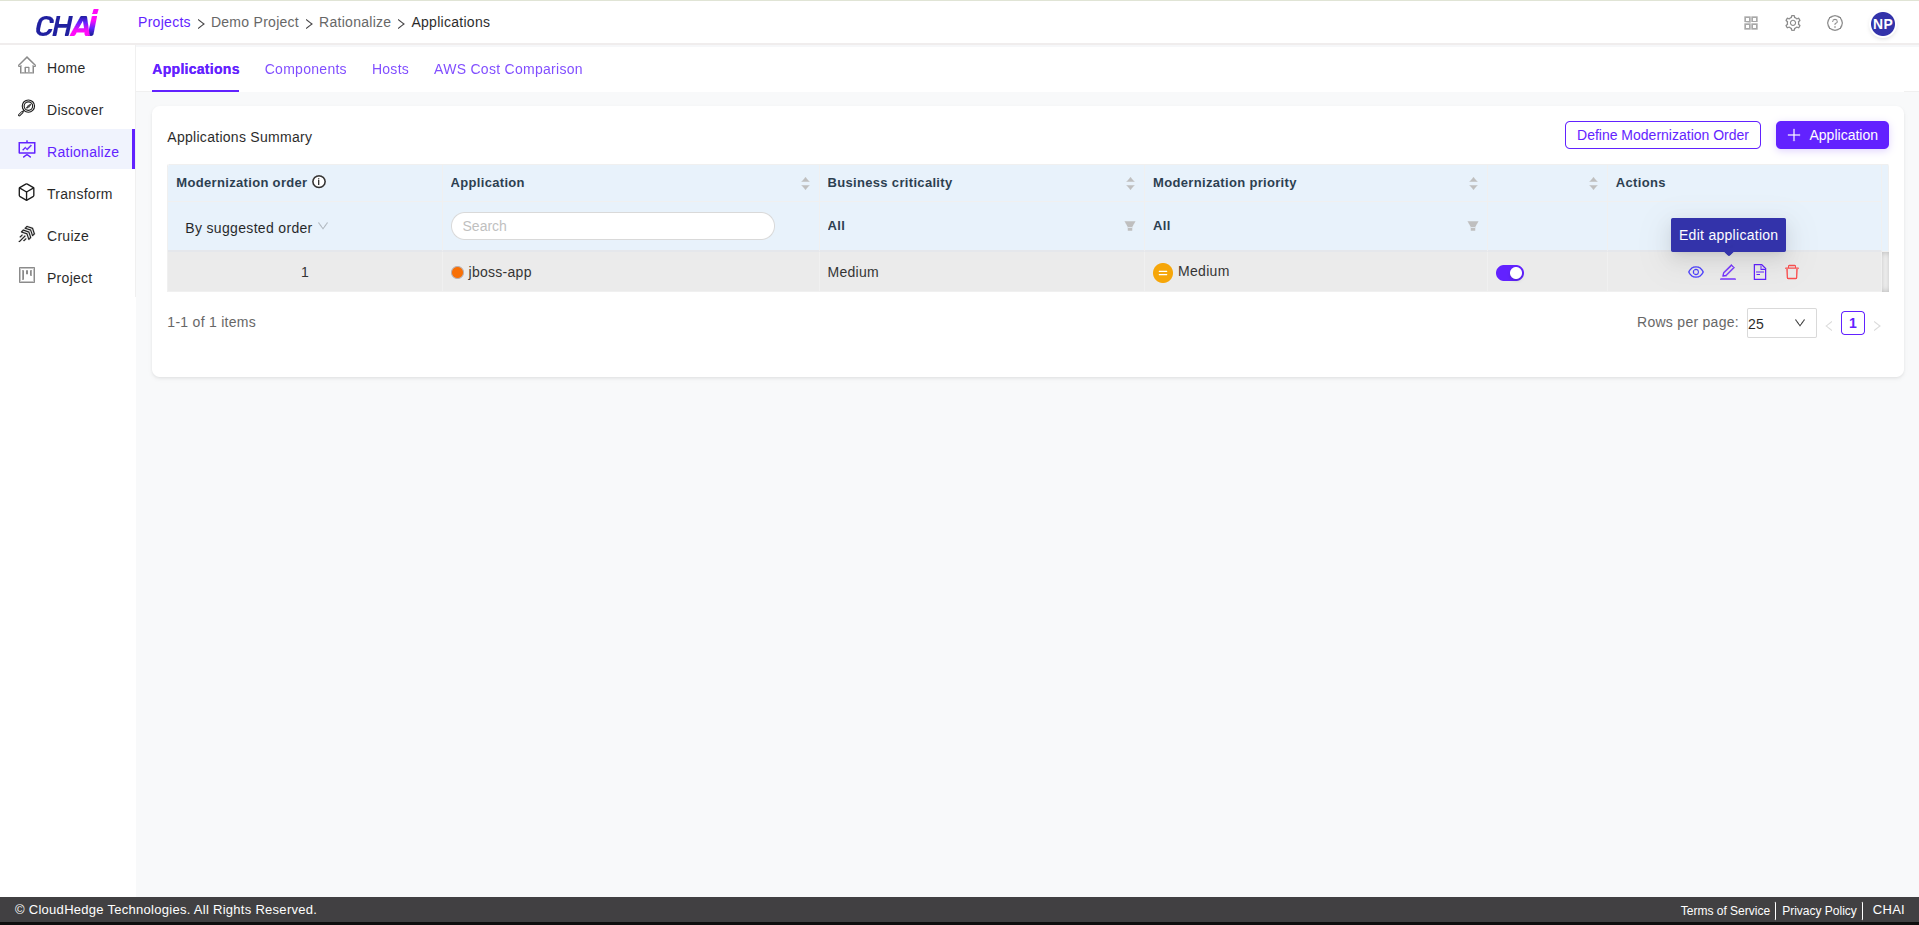
Step 4: Click Edit Icon
Click the Edit icon associated with the respective application to edit.
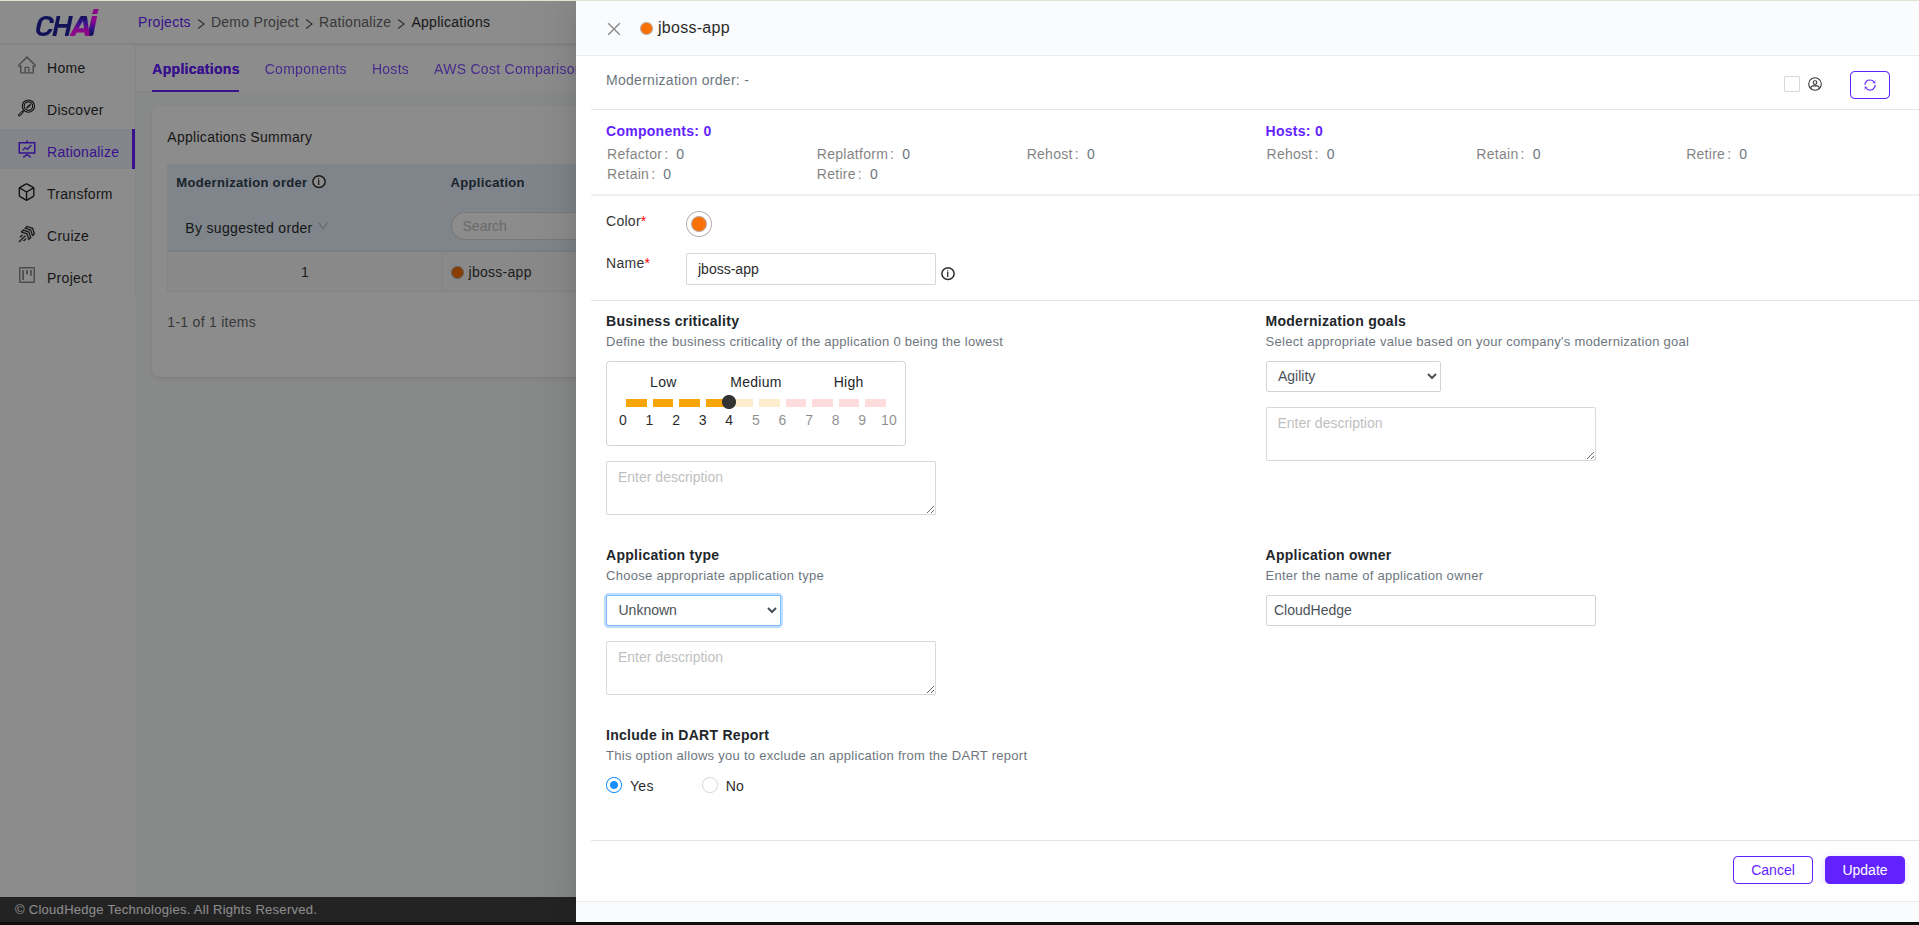
Step 5: Update Application Details
The following screen will be displayed for application update.
Step 6: Save or Cancel Changes
Make the necessary changes and click Update. If you do not want to make any changes, click Cancel.
How to Delete an Application
Step 1: Login to CHAI™ Portal
Login to the CHAI™ portal.
Step 2: Navigate to Rationalize Tab
Click on the project where you want to delete an application and navigate to the Rationalize tab.
Step 3: View Applications List
You will see a list of all the existing applications that you have created previously.
Step 4: Click Delete Icon
Click the Trash (delete) icon associated with the respective application to delete.
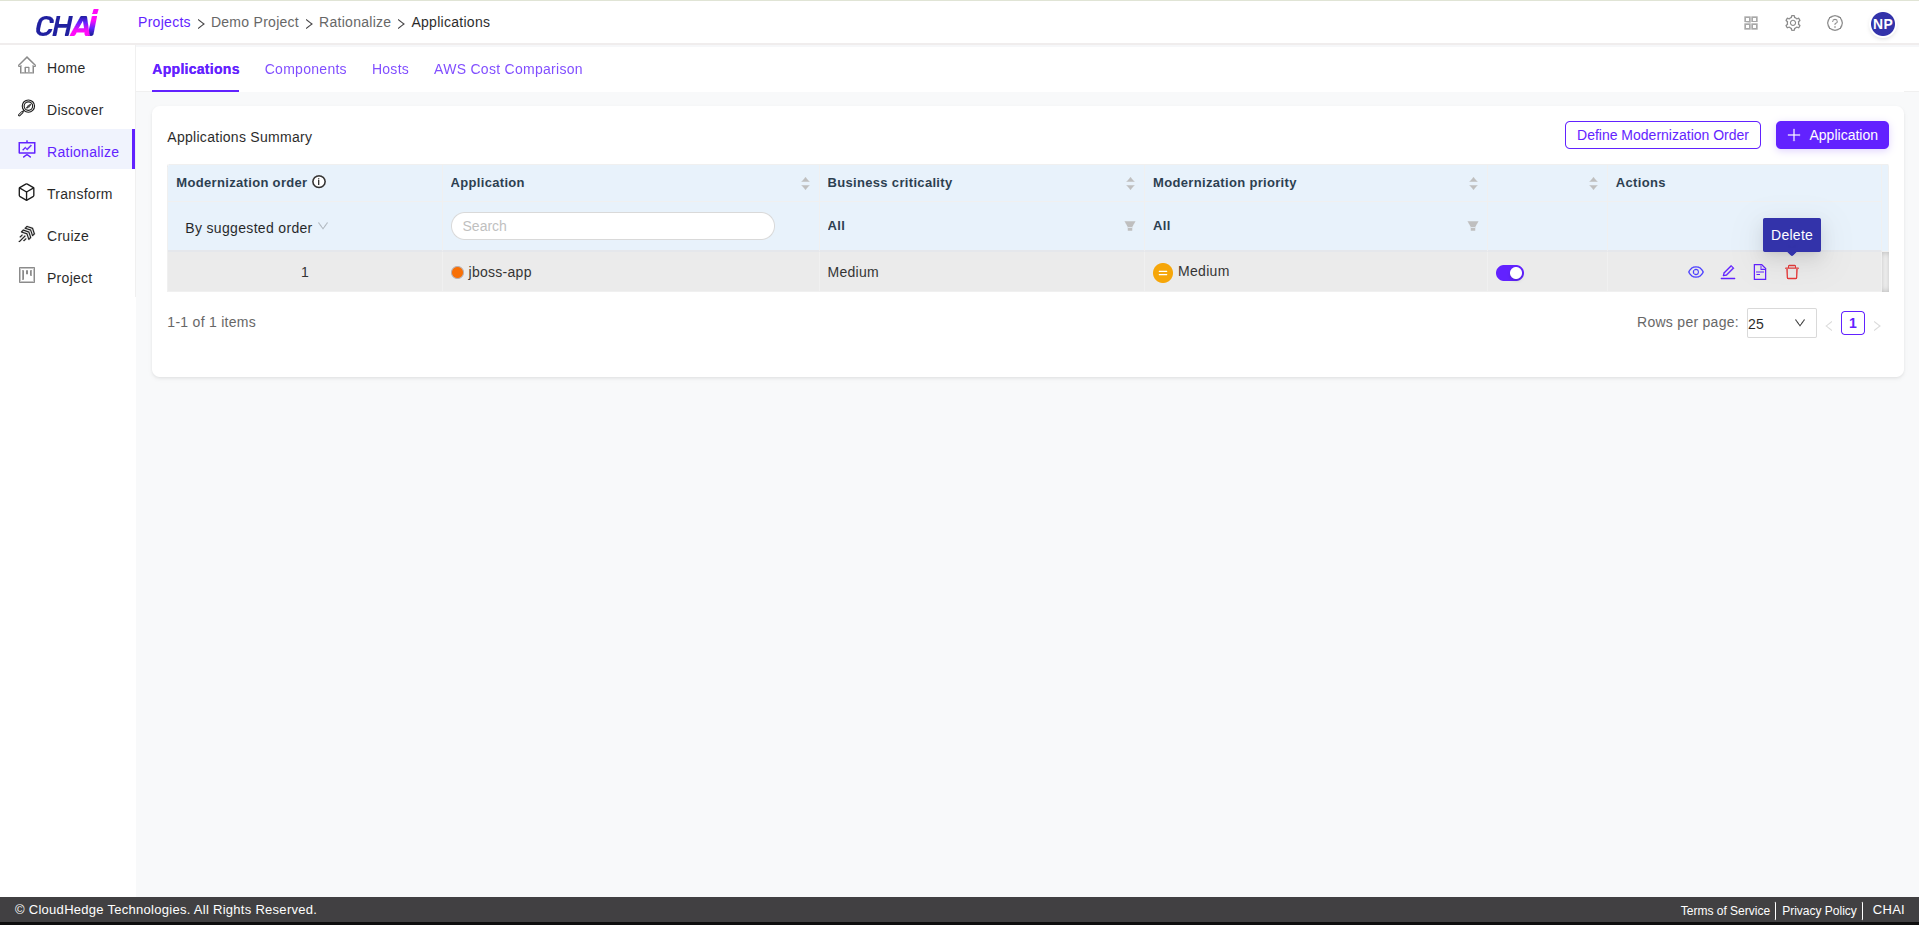
Step 5: Confirm Deletion
A confirmation dialog box will be displayed.

Step 6: Complete Deletion
Clicking Cancel will cancel the deletion process, and clicking Delete will delete the application.

How to Assign an Application to a Process
Step 1: Login to CHAI™ Portal
Login to the CHAI™ portal.
Step 2: Navigate to Rationalize Tab
Click on the project where you want to add an application to a process and navigate to the Rationalize tab.
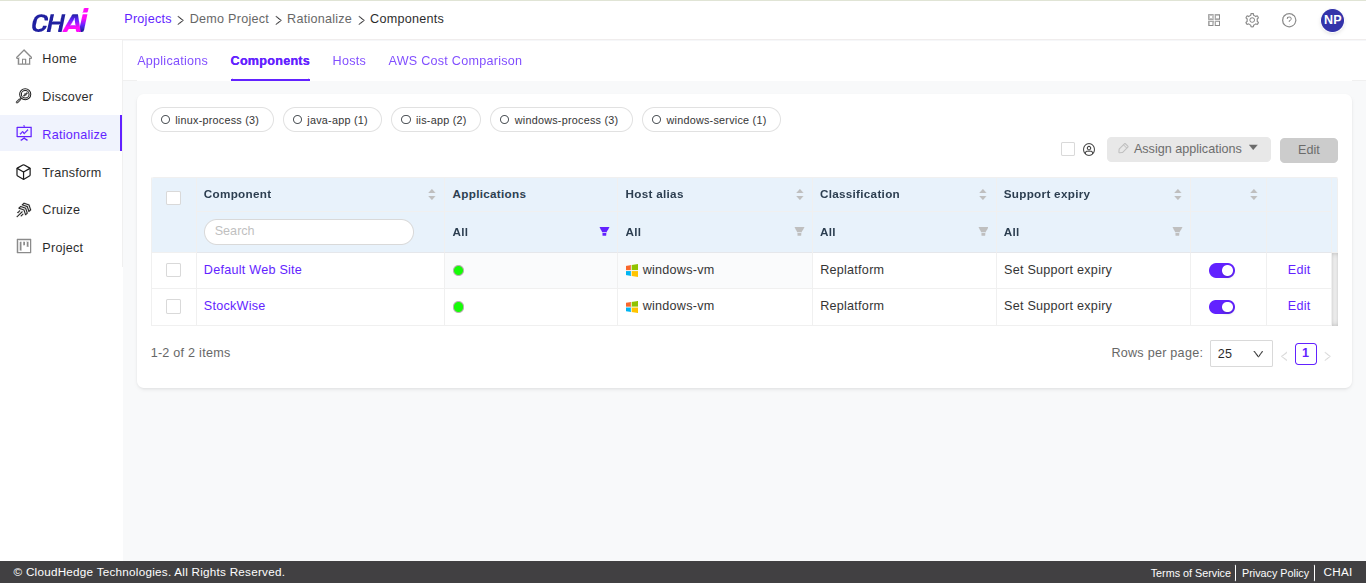
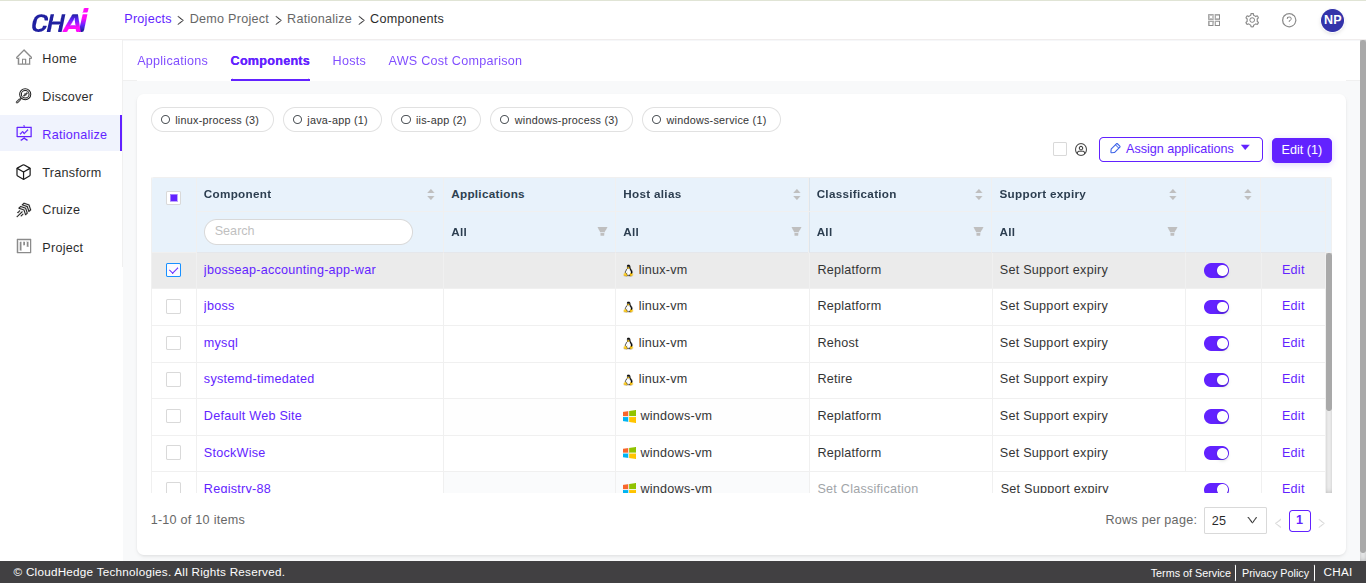
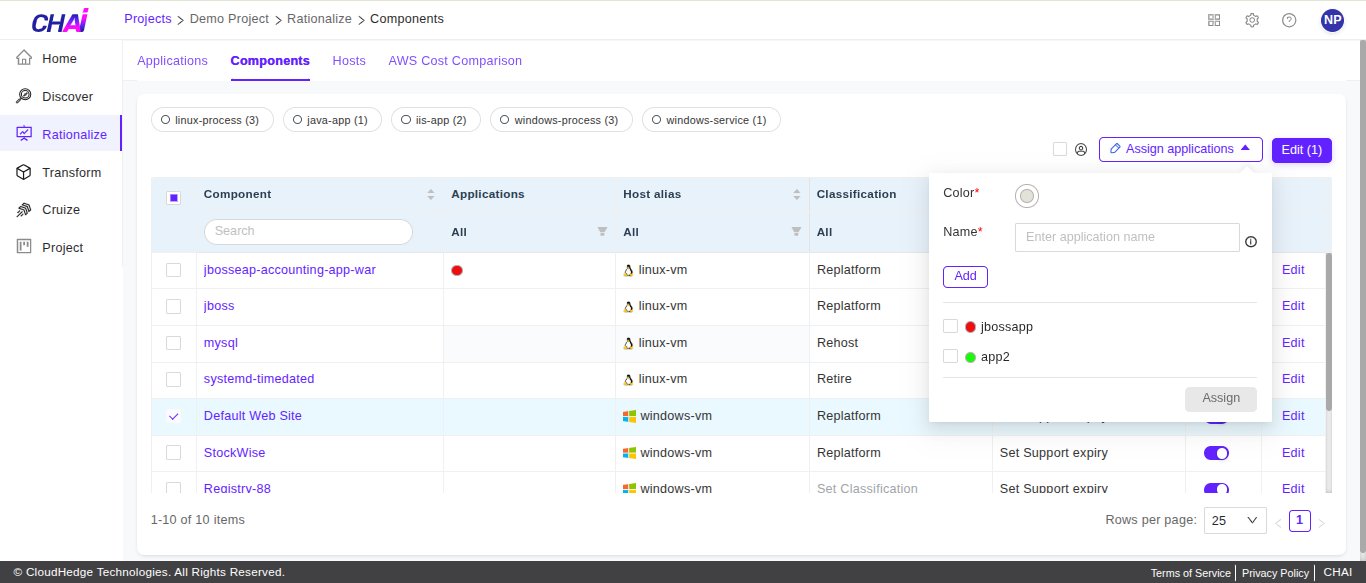
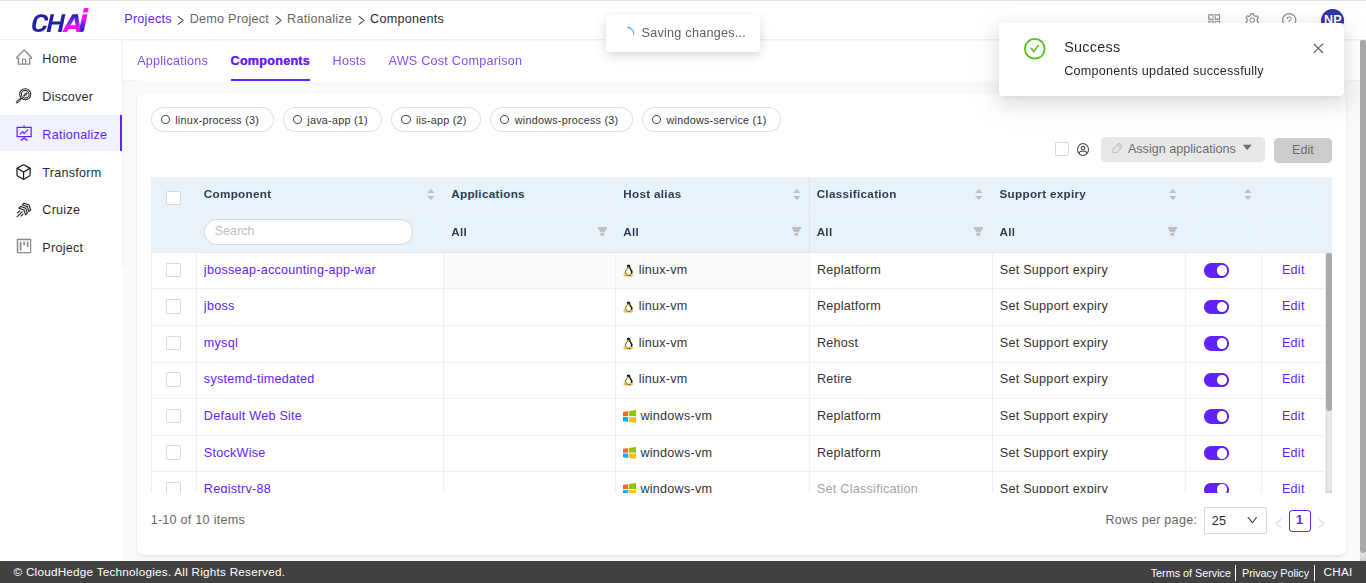
Step 3: Navigate to Components Tab
Click on the Components tab.
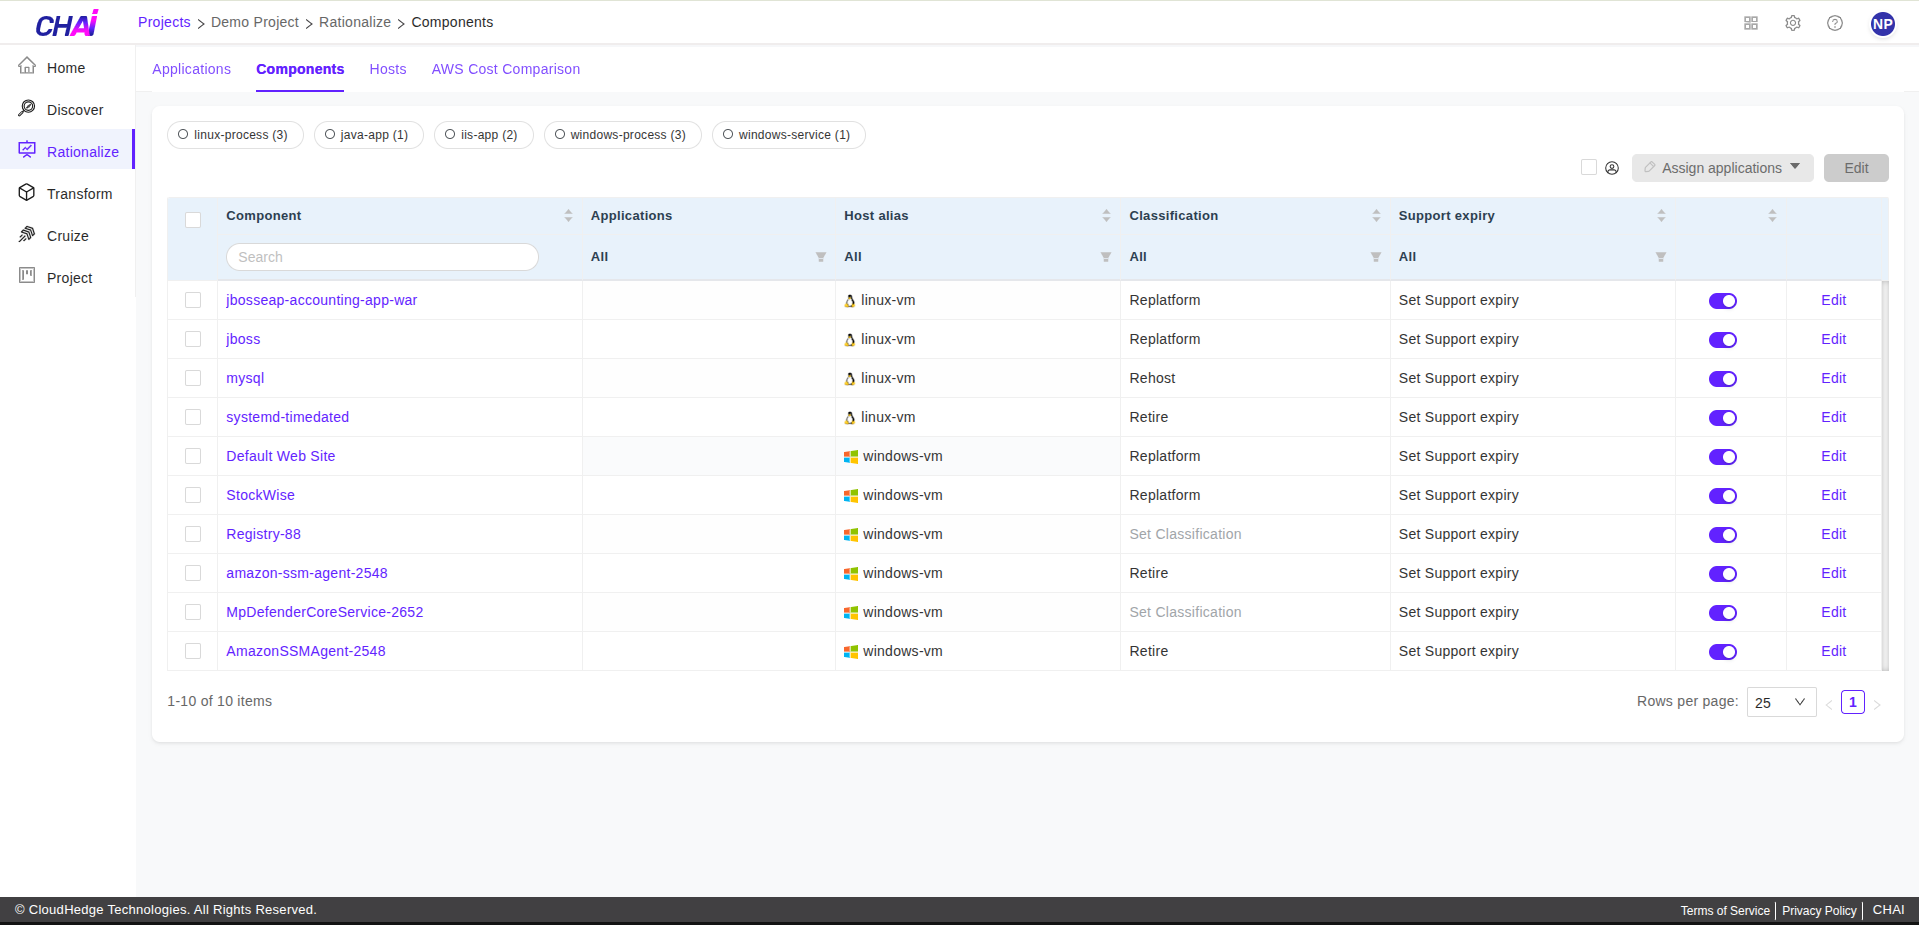
Step 4: Select Process
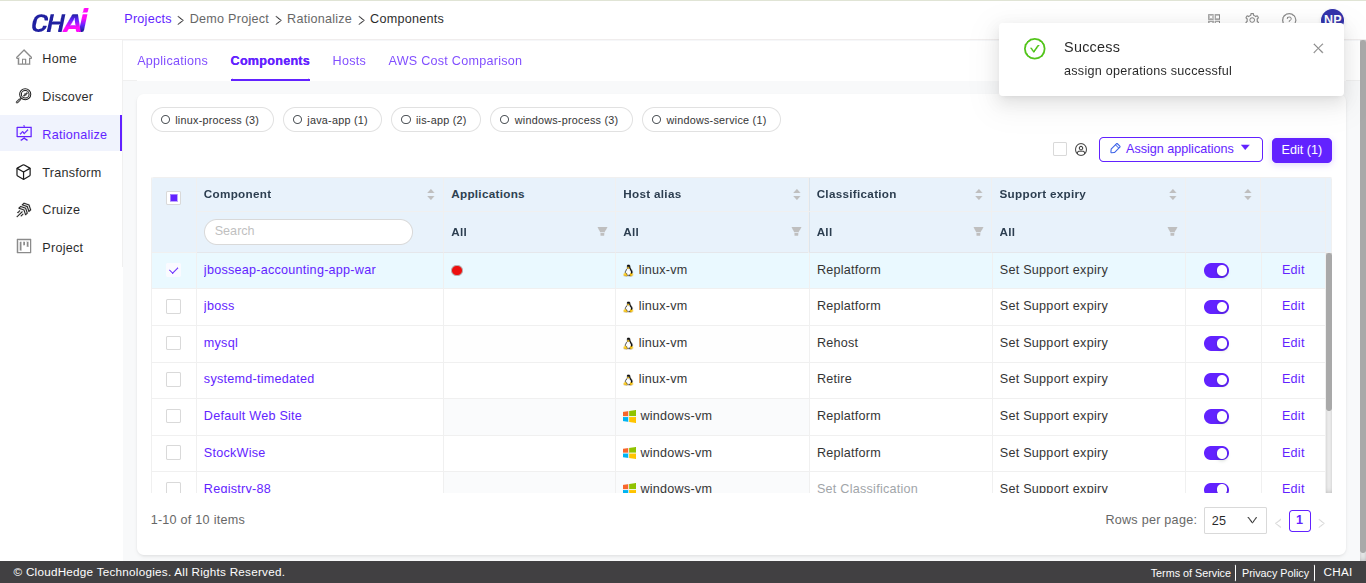
Select a process and click Assign applications.
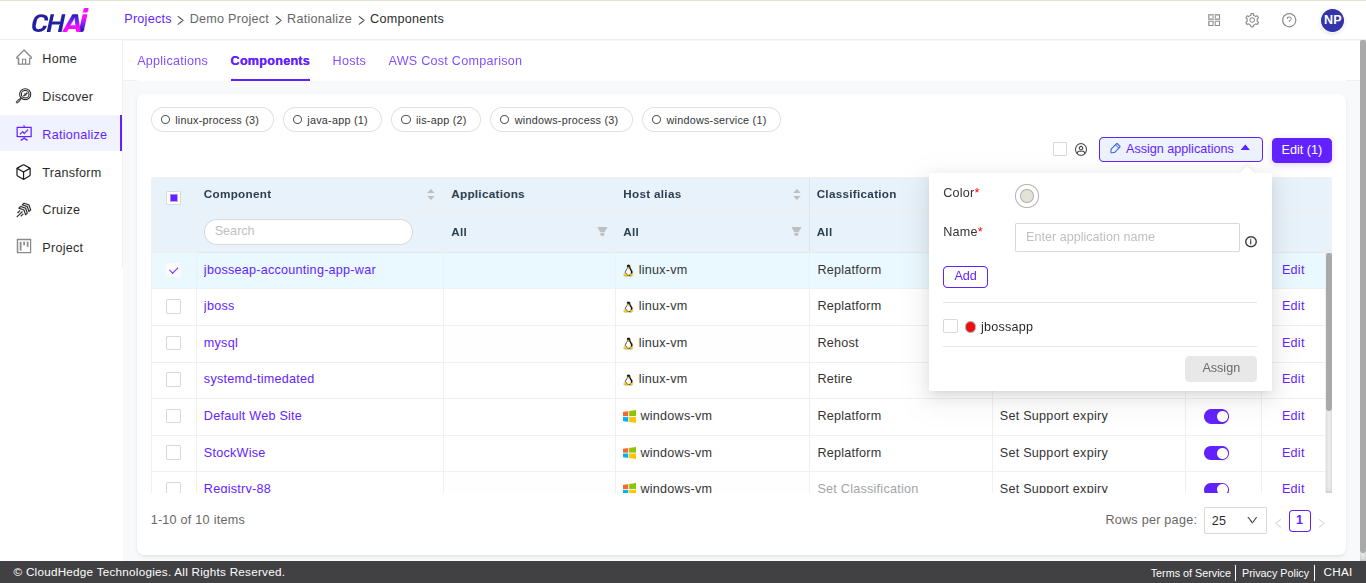
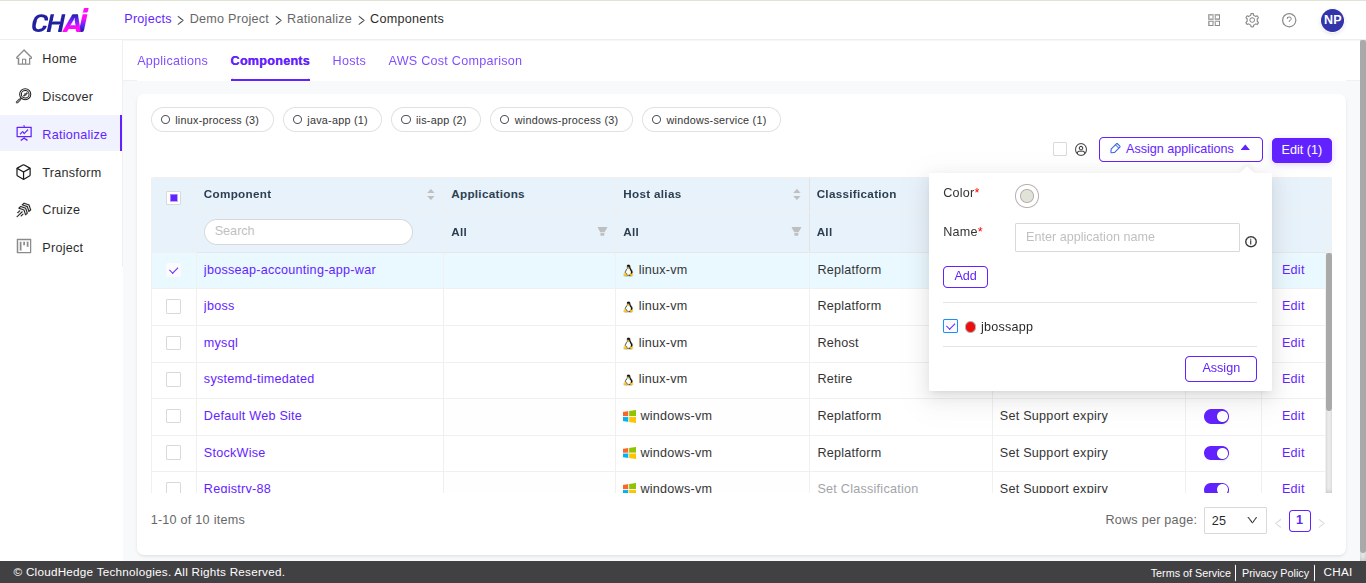
Step 5: Select and Assign Application
The added applications will be displayed. Select the application you want to assign and click Assign.
Additional Options
- You can use the same process to assign an application to multiple processes by selecting multiple processes in step 4
- You can assign multiple applications to a process or to multiple processes by selecting multiple applications in step 5
How to Remove/Unlink an Application from a Process
Step 1: Login to CHAI™ Portal
Login to the CHAI™ portal.
Step 2: Navigate to Rationalize Tab
Click on the project where you want to remove an application from a process and navigate to the Rationalize tab.
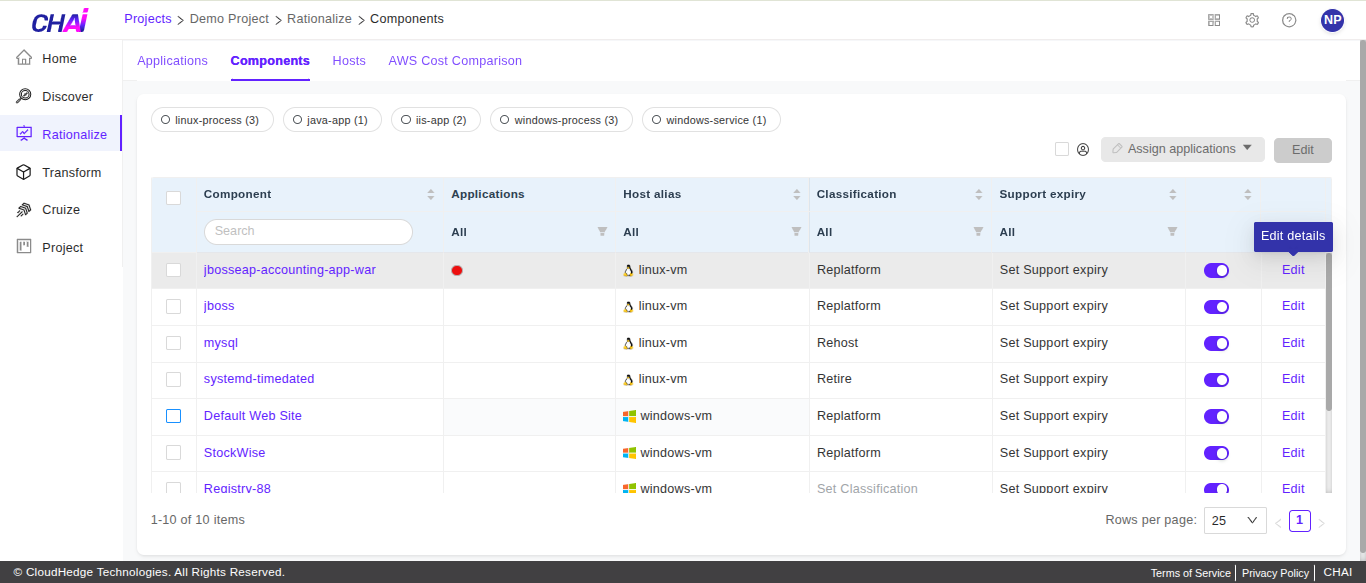
Step 3: Navigate to Components Tab
Click on the Components tab.
Step 4: Select Component and Edit
Select the component and click the Edit button in the respective row as shown below.
Step 5: Remove Application
Click the - (minus) button in front of the desired application(s).
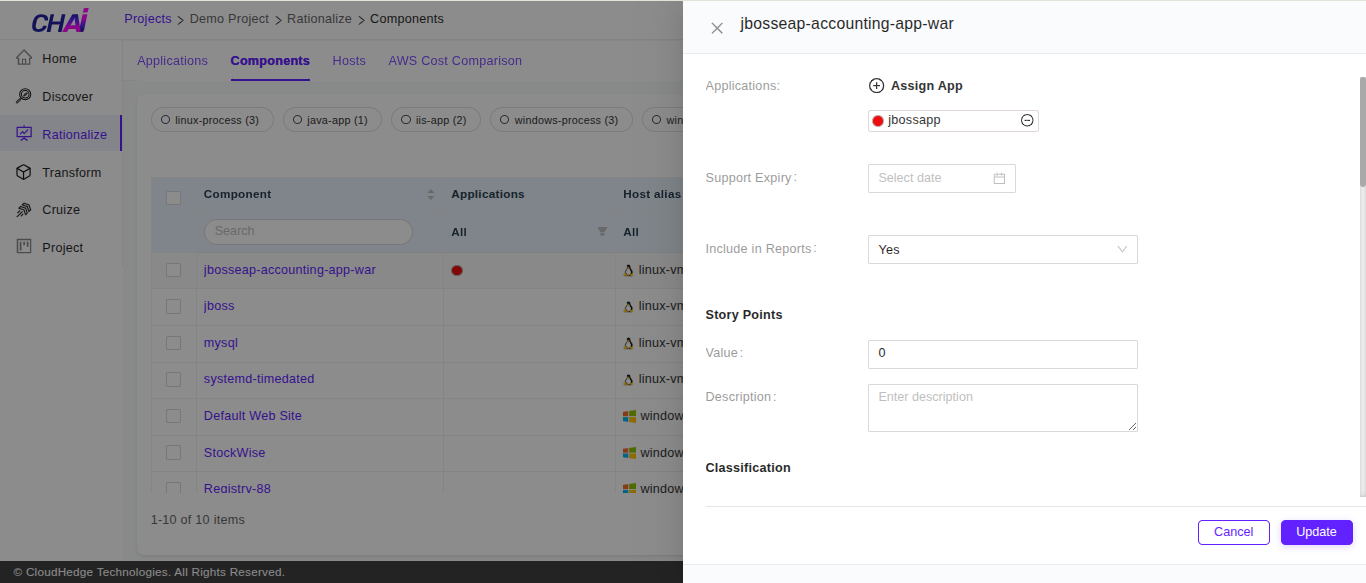
Step 6: Update Changes
Click Update.
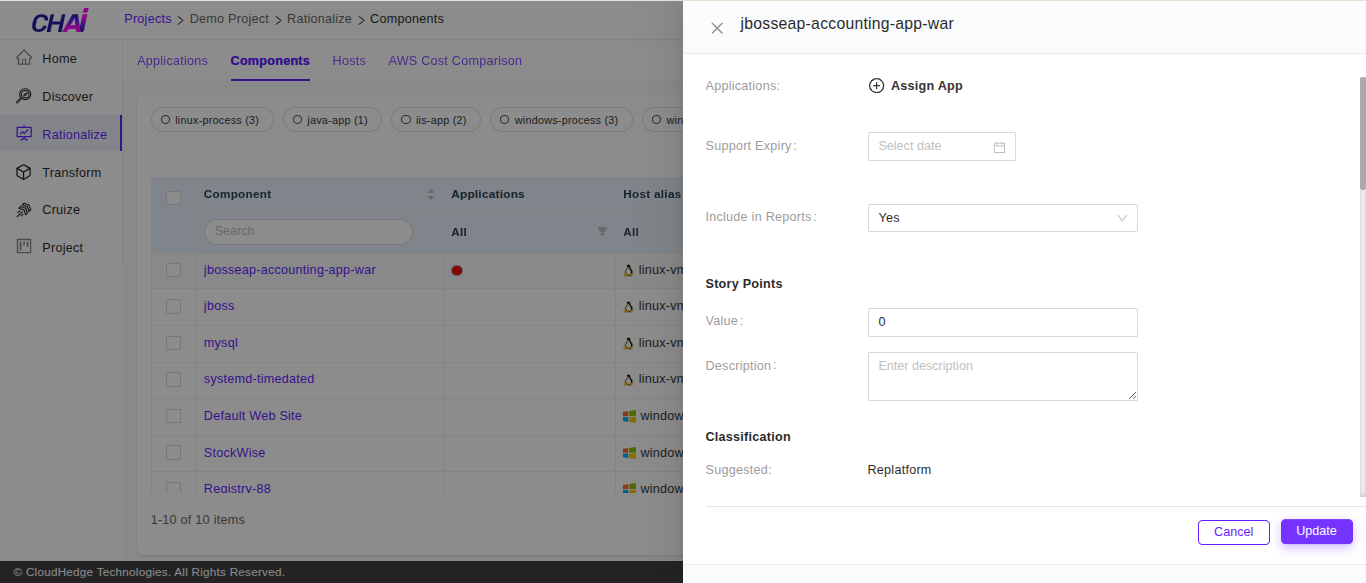
Step 7: Verify Removal
The application association is removed.
How to Use Application to Filter Processes
Applications are useful for grouping and filtering of processes.
Step 1: Login to CHAI™ Portal
Login to the CHAI™ portal.
Step 2: Navigate to Rationalize Tab
Click on the project and navigate to the Rationalize tab.
Step 3: Click Filter Icon
Click on the filter icon in the Applications column.

Step 4: Select Applications
Select the applications you want to filter on.
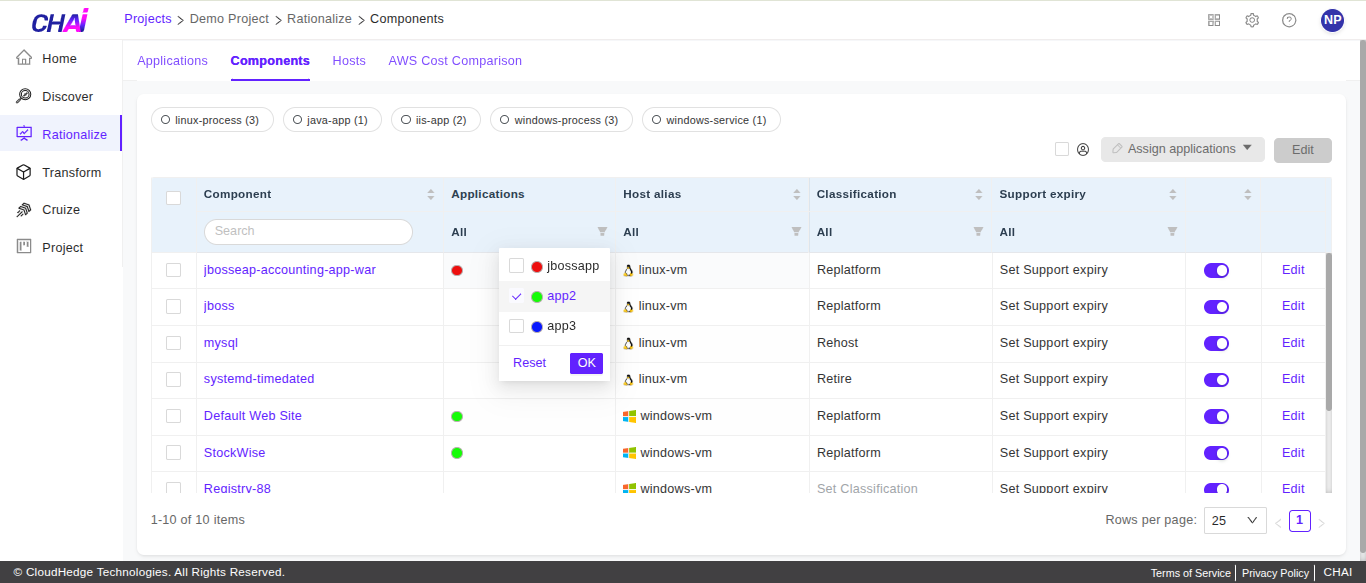
Step 5: View Filtered Processes
Once you click Ok, only the processes tagged with the application are displayed.